
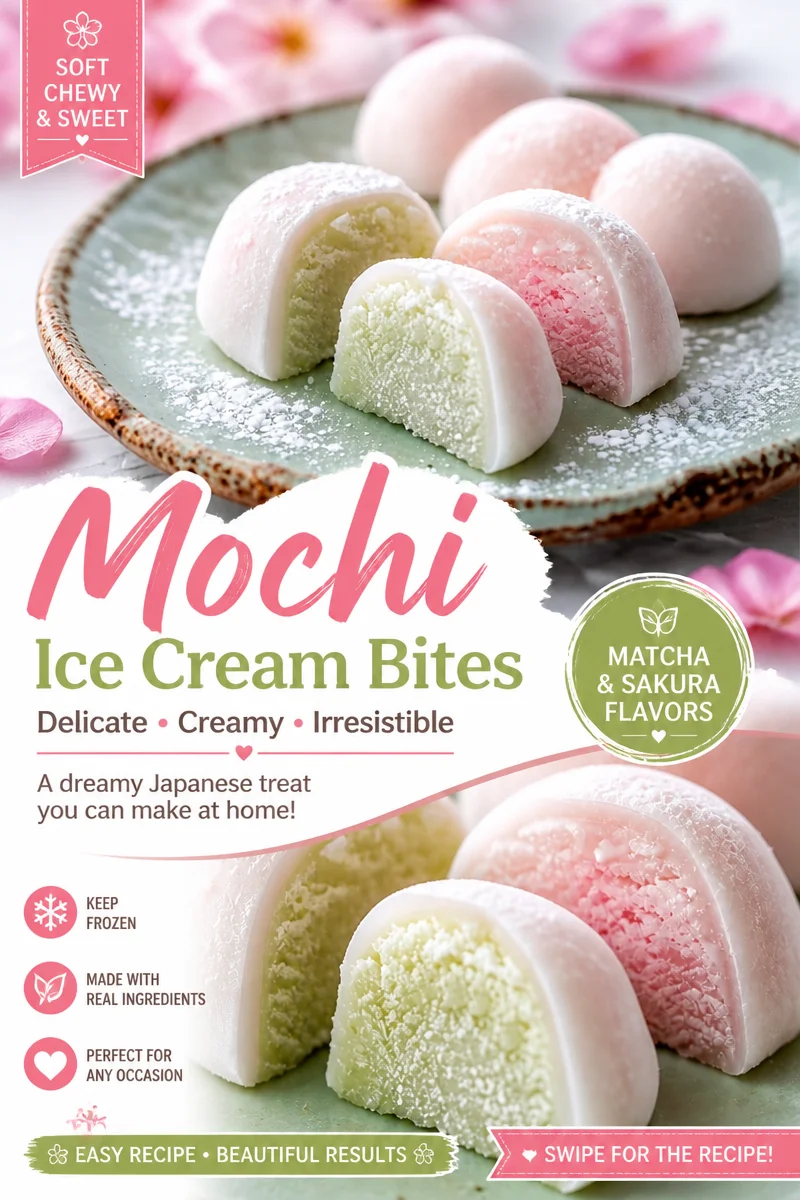
Mochi Ice Cream Recipe: Melt In Your Mouth Japanese & Korean Delights is the kind of treat I make when I want something fun, cold, and a little different from the usual cookies and brownies. You know that moment when you open the freezer and nothing feels exciting? That is exactly when mochi ice cream saves the day. It is chewy on the outside, creamy on the inside, and honestly kind of magical when you bite through that soft mochi layer. The first time I made it at home, I laughed because it looked messy, but it tasted like something I would happily pay for at a dessert shop. If you have ever wanted to try it but felt intimidated, I have you. 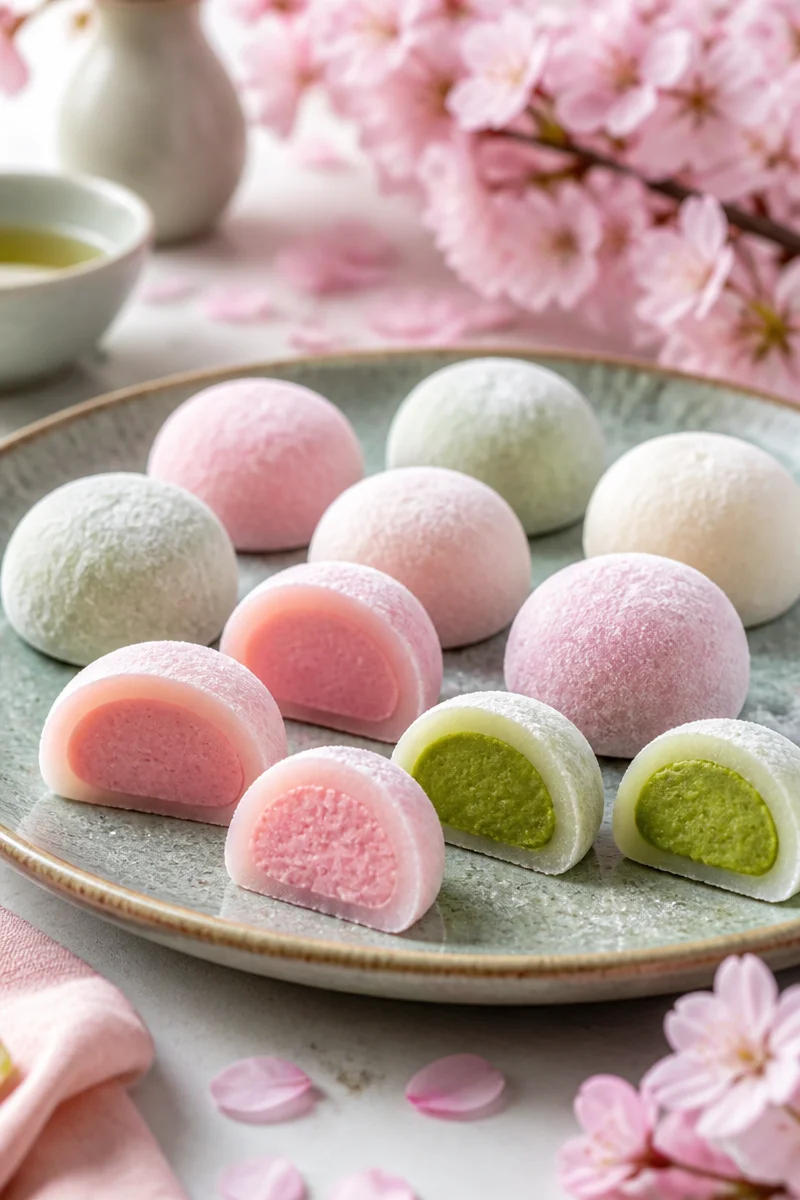
Understanding Mochi: Types and Characteristics
Let us clear up one thing first: mochi is not just a “dessert trend.” It is a traditional Japanese rice cake made from sweet glutinous rice flour, and it has that signature chewy, stretchy bite. For mochi ice cream, we use a softer, sweeter mochi wrapper that stays tender even after freezing.
Here are the main types you will run into:
Traditional mochi is usually pounded from cooked rice and can be firmer and more rustic. Modern mochi (microwave style) uses sweet rice flour and is what most home cooks do because it is fast. Then there is daifuku style, which is mochi wrapped around a filling, and that idea is basically what mochi ice cream borrows.
Texture wise, you are aiming for mochi that is:
Soft enough to bite through, elastic but not tough, and not sticky on the outside once it is dusted. If your mochi turns out rubbery, it usually means it cooked too long or dried out while you were working.
Also, a quick flavor note. While today we are focusing on chocolate, you can swap flavors pretty easily. I do this the same way I switch up desserts in my kitchen depending on my mood. If you are in a cookie mood, you might love these melt in your mouth lemon blueberry cookies for a bright, fruity dessert day.

Essential Equipment for Making Mochi
You do not need fancy tools, but a few basics make the whole thing way less stressful. The biggest “secret” is setting yourself up before your hands get sticky. When I forget and start digging through drawers mid recipe, it turns into a powdered sugar tornado in my kitchen.
What you will want:
- Microwave safe bowl (glass is great)
- Silicone spatula for mixing hot sticky mochi
- Measuring cups and spoons
- Plastic wrap or parchment paper
- Small scoop (cookie scoop works) for ice cream balls
- Fine mesh strainer for dusting cocoa or starch
- Rolling pin (optional but helpful)
- Baking sheet that fits in your freezer
The freezer setup matters. You want to freeze your ice cream scoops until firm before wrapping. If they are soft, they melt and slide around, and then you end up with a chocolate mochi situation that looks like a tiny abstract art project.
If you like having a few desserts ready to grab, mochi ice cream is awesome for that. I keep a little freezer stash alongside other make ahead sweets like no bake pink velvet cheesecake bites, and it makes weeknights feel a little more special.
Detailed Ingredients List for Chocolate Mochi
This section is where I try to save you from surprise grocery runs. The ingredients are simple, but the details matter. For example, sweet rice flour is not the same as regular rice flour. The bag usually says “glutinous rice flour” even though it does not contain gluten. It just means sticky.
- Sweet rice flour (glutinous rice flour): 1 cup
- Granulated sugar: 1 quarter cup (adjust a bit if your ice cream is very sweet)
- Unsweetened cocoa powder: 3 tablespoons (plus extra for dusting if you want)
- Milk: 3 quarter cup (whole milk makes it richer, but any milk works)
- Vanilla extract: 1 teaspoon
- Salt: a small pinch (it makes the chocolate taste deeper)
- Cornstarch or potato starch: for dusting
- Chocolate ice cream: about 1 pint (or your favorite flavor)
About the filling: classic chocolate is always a win, but you can do coffee, cookies and cream, strawberry, mango, green tea, you name it. If you have a cake craving too, bookmark buttercream cake bliss for your next baking day.
Step-by-Step Guide to Making Chocolate Mochi
This is the part where you take a deep breath and remember: it does not have to look perfect. Homemade mochi ice cream tastes amazing even if the seams are not flawless. The goal is a soft wrapper that keeps the ice cream contained and gives you that chewy bite.
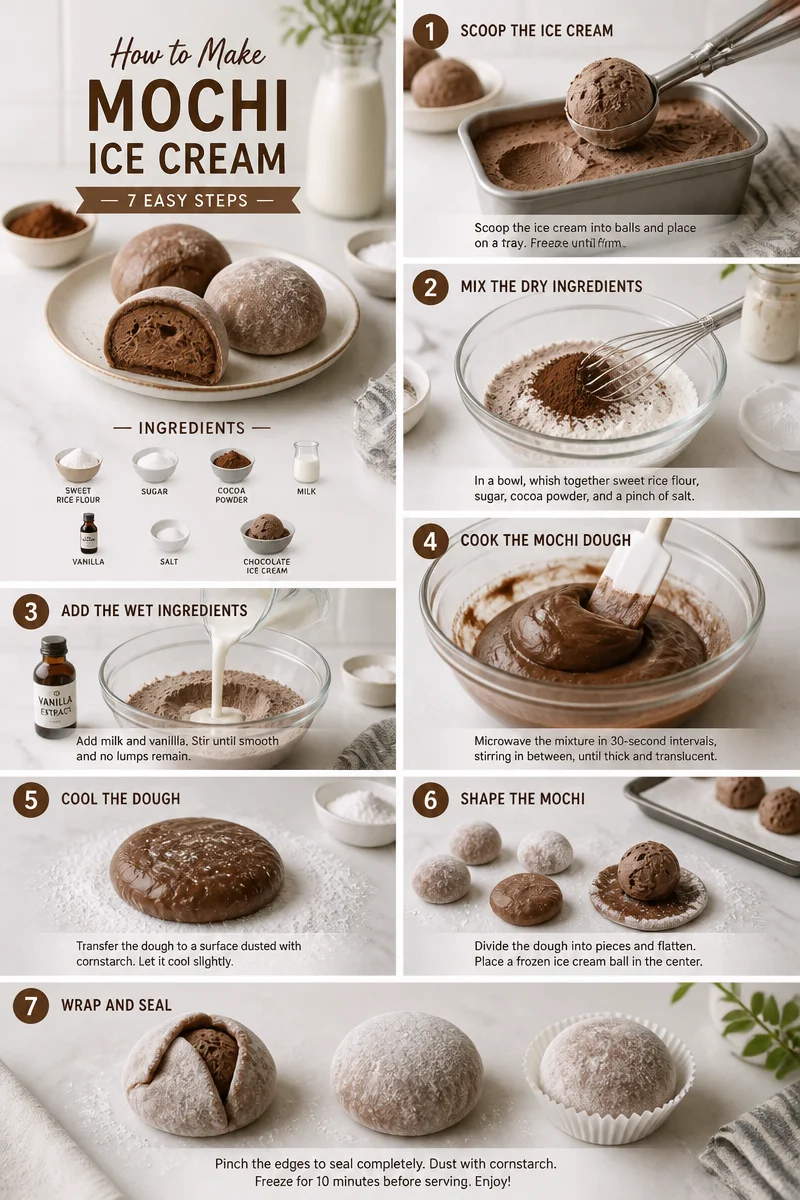
1) Prep the ice cream first
Scoop your ice cream into 8 to 10 small balls and place them on a parchment lined baking sheet. Freeze them until very firm, at least 1 to 2 hours. I usually do this earlier in the day so I am not waiting around later.
2) Mix the chocolate mochi batter
In a microwave safe bowl, whisk together sweet rice flour, sugar, cocoa powder, and salt. Add the milk and vanilla and whisk until smooth. It will look like thin chocolate batter.
3) Microwave and stir
Cover the bowl loosely with plastic wrap. Microwave for 1 minute, stir well. Microwave another 1 minute, stir again. Then microwave in 30 second bursts until it turns thick and glossy. It should look like a sticky dough and pull away from the sides a bit when you stir.
4) Cool and roll it out
Dust a piece of parchment with cornstarch or potato starch. Scrape the hot mochi onto it, dust the top lightly, and let it cool for about 10 minutes. Do not let it sit too long uncovered or it can dry out. Roll it out to about 1 eighth inch thick. If it sticks, add a little more starch, but do not go crazy or it will taste powdery.
5) Cut and wrap quickly
Cut circles large enough to wrap your ice cream, usually 3 and a half to 4 inches wide. Working with one ice cream ball at a time, place it in the center, pull the mochi up around it, pinch to seal, and set it seam side down. Put it back in the freezer right away. Repeat until you are done.
Once they are all wrapped, freeze the mochi ice cream at least 2 hours before eating. They are best after they firm up, but not so long that the mochi gets too hard. If they have been in there overnight, let them sit on the counter for 2 to 3 minutes before biting in.
“I thought this would be impossible at home, but your steps made it so doable. Mine were a little lopsided, but they tasted like the mochi ice cream from my favorite shop.”
One more practical tip: if you are making these for guests, keep them in an airtight container in the freezer so they do not pick up freezer smells. Nobody wants their dessert to taste like frozen garlic bread.
Tips for Perfecting Your Mochi Recipe
I have made every mistake possible, so you do not have to. Here are the simple fixes that make a big difference.
Keep your ice cream very firm. This is the number one thing. Soft ice cream turns wrapping into a meltdown.
Do not overcook the mochi. If it gets rubbery, it usually went too long in the microwave. Stop when it is thick, shiny, and stretchy.
Use starch like a tool, not a flavor. Dust enough so it does not stick, but brush off extra. Too much cornstarch tastes chalky.
Work in small batches. I like to cut a few circles, wrap a few, and return everything to the freezer. The less time the ice cream spends out, the better.
Choose flavors that freeze well. Super low fat ice creams can get icy. A creamier base gives you that soft bite inside.
And hey, if your sweet tooth is on a roll after this, you might also want something classic and easy like soft and chewy sugar cookies that melt in your mouth. I make those when I want a cozy, no freezer required dessert.
Common Questions
1) Why is my mochi too sticky to handle?
You probably need a bit more starch on the surface, or the mochi is still too hot. Let it cool a few minutes, then dust lightly and try again.
2) Why did my mochi turn tough after freezing?
It may be too thick, overcooked, or stored too long uncovered. Roll it thinner and store the finished mochi ice cream in an airtight container.
3) Can I make mochi ice cream without a microwave?
Yes. You can steam the mixture on the stove, then stir until it becomes stretchy and glossy. It just takes longer and you have to keep an eye on it.
4) How long does mochi ice cream last in the freezer?
It is best within 1 to 2 weeks for the softest texture. It is still safe longer, but the mochi can slowly get firmer.
5) Can I use other fillings besides ice cream?
Absolutely. You can fill mochi with sweetened red bean paste, Nutella, or even whipped cream that is frozen into little dollops, but ice cream is the easiest and most satisfying.
A sweet little freezer win to end on
If you take one thing from this, let it be this: mochi ice cream is totally doable at home if you freeze your scoops well and work quickly. Once you get the hang of it, you will want to keep a batch tucked away for late night cravings and surprise guests. If you want more inspiration, I found this helpful Chocolate Mochi Recipe – Ms Shi and Mr He, and for another chilly dessert vibe you might like Korean Milk Ice Sorbet: Injeolmi Bingsu. And if you are curious about other soft, filled sweets, this one is a fun read too: Finally Perfected! The Fudgiest, Melt-in-Your-Mouth Japanese …. Now go make your own Mochi Ice Cream Recipe batch, stash it in the freezer, and enjoy that chewy creamy bite you totally earned.
Chocolate Mochi Ice Cream
Ingredients
For the Mochi
- 1 cup Sweet rice flour (glutinous rice flour) Ensure it's glutinous rice flour, not regular rice flour.
- 1/4 cup Granulated sugar Adjust based on ice cream sweetness.
- 3 tablespoons Unsweetened cocoa powder Plus extra for dusting if desired.
- 3/4 cup Milk Whole milk is recommended for richness.
- 1 teaspoon Vanilla extract
- 1 pinch Salt Enhances chocolate flavor.
- Cornstarch or potato starch For dusting.
For the Filling
- 1 pint Chocolate ice cream Or your favorite flavor.
Instructions
Preparation
- Scoop your ice cream into 8 to 10 small balls and place them on a parchment lined baking sheet. Freeze them until very firm, at least 1 to 2 hours.
- In a microwave safe bowl, whisk together sweet rice flour, sugar, cocoa powder, and salt. Add the milk and vanilla and whisk until smooth.
- Cover the bowl loosely with plastic wrap. Microwave for 1 minute, stir well. Microwave another 1 minute, stir again. Then microwave in 30 second bursts until thick and glossy.
- Dust a piece of parchment with cornstarch or potato starch. Scrape the hot mochi onto it, dust the top lightly, and let it cool for about 10 minutes.
- Roll out the mochi to about 1/8 inch thick. If it sticks, add a little more starch.
- Cut circles large enough to wrap your ice cream, usually 3 and a half to 4 inches wide. Working with one ice cream ball at a time, place it in the center, pull the mochi up around it, pinch to seal, and set it seam side down.
- Once wrapped, freeze the mochi ice cream for at least 2 hours before eating.