

Black Forest Cake Recipe cravings usually hit right when you need a dessert that feels special, but you do not want to spend all day stressing in the kitchen. I have totally been there, standing in front of the fridge hoping a slice of cake will magically appear. This one is my go to when I want chocolate, cherries, and that fluffy cream vibe all in one bite. It looks fancy enough for birthdays, but it is honestly very doable at home. Let me walk you through it the way I make it, with the little tips that keep it simple and dependable. 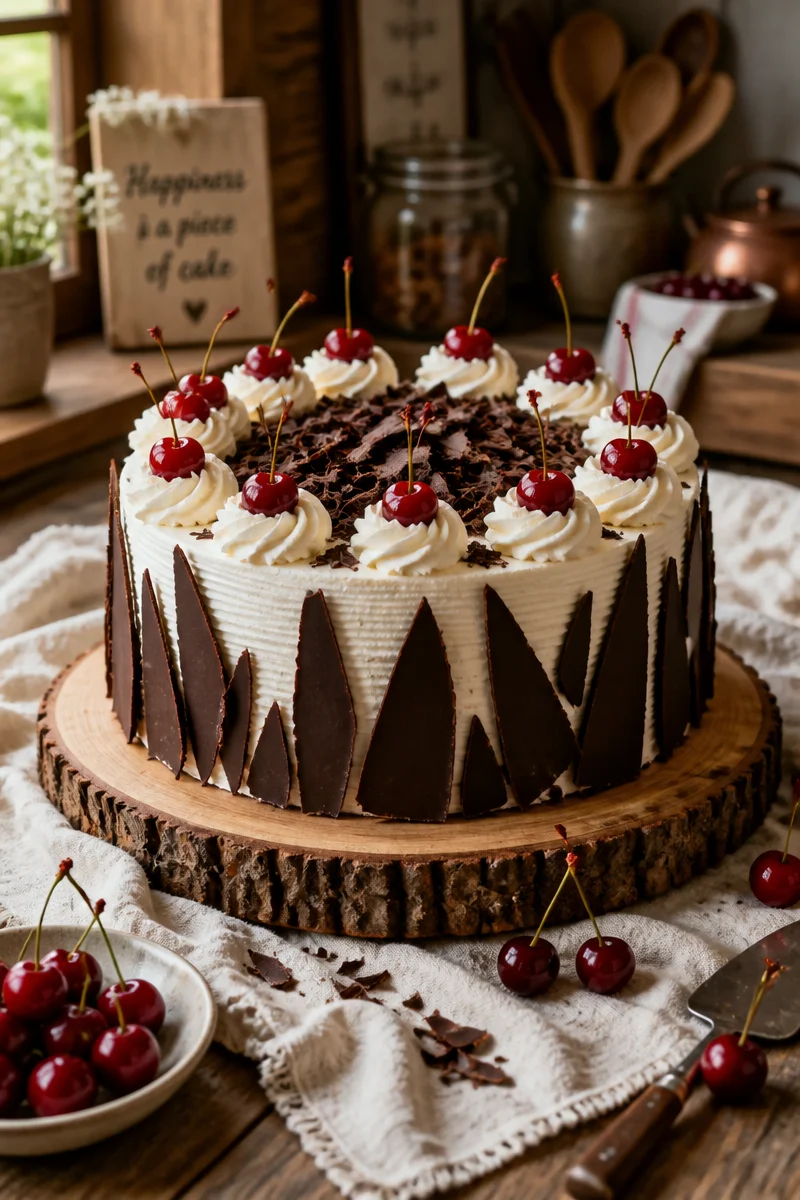
What goes in Black Forest Cake
This cake is basically a cozy stack of chocolate sponge, cherry syrup, and soft whipped cream, then you finish with chocolate shavings and more cherries. The balance matters. If you go too sweet, you lose that classic Black Forest taste. If you go too dry, the whole thing feels like a sad brownie sandwich. We are not doing that.
Here is what I use most of the time. If you bake a lot, you probably have half of this already.
- Flour: all purpose works great.
- Cocoa powder: unsweetened, for a deep chocolate taste.
- Sugar: regular white sugar.
- Eggs: they give the sponge its lift.
- Baking powder and baking soda: helps the cake rise and stay light.
- Buttermilk (or milk plus a little lemon juice): keeps the crumb tender.
- Oil: I like vegetable oil for a moist sponge.
- Vanilla and a pinch of salt: small things, big difference.
- Cherries: jarred sour cherries or frozen cherries both work. If using frozen, thaw first.
- Cherry juice or the cherry liquid from the jar: for the syrup.
- Heavy cream: cold, for whipping.
- Powdered sugar: sweetens the cream without making it gritty.
- Chocolate shavings: a bar of chocolate and a veggie peeler makes this easy.
If you love chocolate desserts in general, you might also want to save this one for later because it is a total crowd pleaser: chocolate lava cake recipe. Different vibe, same chocolate happiness.
One more practical note: you do not need alcohol for a good Black Forest Cake Recipe. Some versions use kirsch, but I am keeping it friendly for everyone. If you want it, add 1 to 2 teaspoons to the cherry syrup, not the cake batter.

Why we need cherry syrup for the sponge
I used to think the syrup was just for tradition, like something fancy people do. Nope. Cherry syrup is the thing that turns chocolate cake layers from good to unforgettable. Chocolate sponge can dry out fast once it is chilled, and the syrup fixes that by soaking in and keeping each bite soft.
It also adds that real cherry flavor so the cake does not taste like plain chocolate with random fruit on top. In a classic Black Forest Cake Recipe, the cherry and chocolate are supposed to feel like they belong together, not like they got introduced at the last minute.
Quick cherry syrup (no stress method)
I do this on the stove while the cake cools.
Cherry syrup ingredients: cherry juice (or jar liquid), a bit of sugar, and cornstarch if you want it slightly thick.
In a small pot, warm 1 cup cherry juice with 2 to 3 tablespoons sugar. Taste it. If your cherries are already sweet, use less. Simmer 3 to 5 minutes. For a thicker syrup, whisk 1 teaspoon cornstarch with 1 tablespoon water and stir it in, then cook 30 to 60 seconds until it looks glossy.
Let it cool before brushing it on the cake. Warm syrup on warm cake can get a little too soggy. The goal is moist, not mushy.
“I tried your syrup tip and it changed everything. My layers stayed soft even the next day, and my family said it tasted like a bakery cake.”
How to make Black Forest Cake
This is the part that sounds like a project, but it is really just bake, cool, whip, stack. I like making it in steps so I do not feel like I am cleaning bowls for hours.
The sponge cake steps
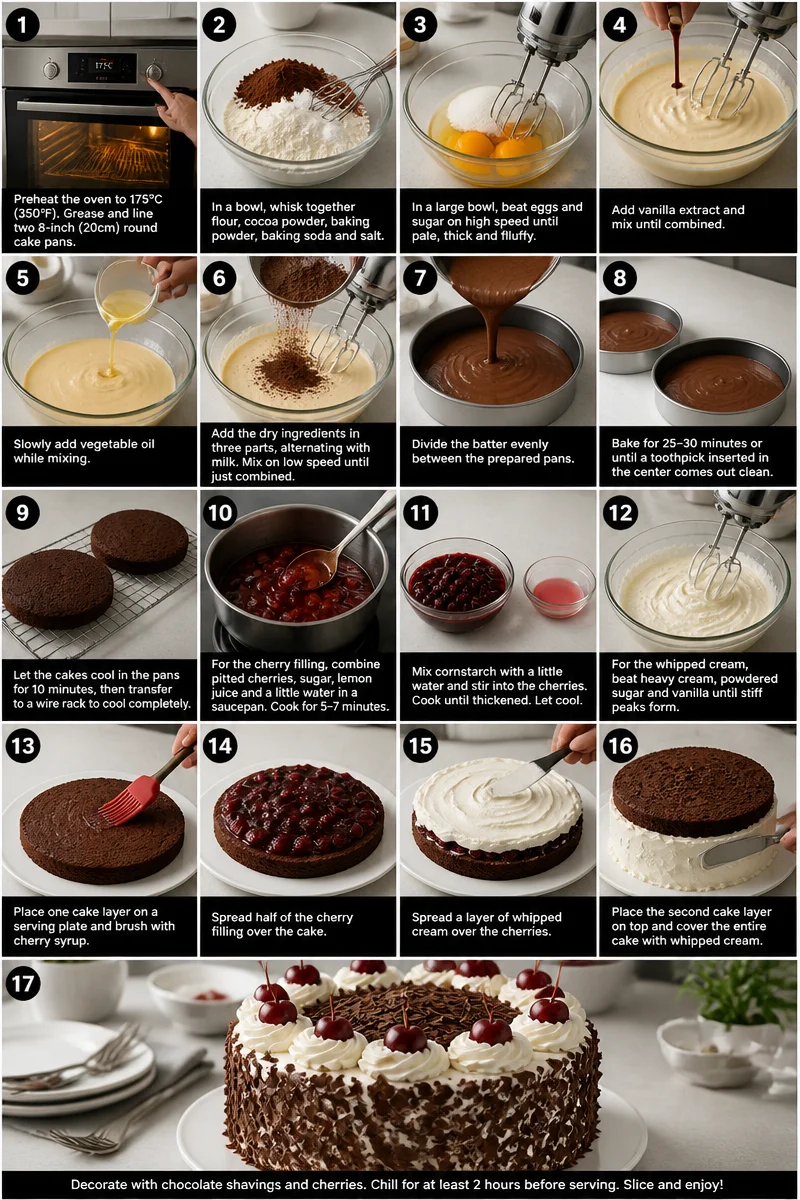
Preheat your oven to 350 F. Grease and line two 8 inch pans, or three if you have them. Two pans are totally fine, you will just slice the layers.
In one bowl, whisk flour, cocoa powder, baking powder, baking soda, and salt. In another bowl, whisk eggs and sugar until it looks lighter, then whisk in oil, buttermilk, and vanilla. Add the dry ingredients and stir until you do not see dry streaks. Do not overmix. Pour into pans.
Bake about 25 to 32 minutes, depending on your pans and oven. A toothpick should come out with a few moist crumbs, not wet batter. Cool in the pan 10 minutes, then turn out onto a rack and cool completely.
While it bakes, I usually daydream about other desserts I want to make next. If cheesecake is your comfort dessert, this one is so worth bookmarking: decadent New York cheesecake recipe.
Once the cakes are cool, level the tops if they domed. If you baked two layers, slice each one in half carefully to get four layers. A long serrated knife helps. Slow and steady.
Assembling the cake
This is the fun part because it starts looking like an actual Black Forest Cake Recipe right away. My biggest tip is to chill your layers for 20 minutes before assembling if your kitchen is warm. Cold cake is easier to stack and less likely to crumble.
Here is the order I use:
1. Put the first cake layer on your plate or cake stand.
2. Brush or spoon cherry syrup all over the surface. Do not be shy, but do not flood it either.
3. Spread a thick layer of whipped cream.
4. Add cherries on top of the cream. Pat them a bit dry so they do not leak everywhere.
5. Repeat with the next layers until the top layer goes on.
Then I do a simple cream coat on the outside. It does not have to be perfect. Black Forest cakes are supposed to look a little rustic with chocolate shavings and cherries covering the sides anyway, so it is very forgiving.
For decorating, press chocolate shavings onto the sides and sprinkle more on top. Finish with cherries. If you have a piping bag, add a few cream swirls on top, but a spoon works if you are not in the mood for piping.
If you want another fruity creamy dessert idea for later, this is such a good one when blueberries are calling your name: deliciously creamy blueberry crumble cheesecake recipe.
Making the Cream
Whipped cream is simple, but it can go wrong if you rush it or if everything is warm. Here is how I keep it steady.
My reliable whipped cream method
Chill your bowl and beaters for 10 minutes if you can. Pour in cold heavy cream, add powdered sugar, and a splash of vanilla. Beat on medium speed until it thickens, then go a bit slower and watch closely until you get soft to medium peaks. That means it holds its shape, but still looks smooth and fluffy.
My basic ratio for a full cake is:
3 to 4 cups heavy cream
1 third to 1 half cup powdered sugar
1 to 2 teaspoons vanilla
If you need extra stability because you are serving it later or it is a hot day, add 2 to 3 tablespoons of instant vanilla pudding mix while whipping. It helps the cream hold up without tasting weird. Just do not overbeat, or it turns grainy and starts heading toward butter.
Once the cake is assembled, chill it at least 2 hours. Overnight is even better because the flavors settle and the layers slice cleaner. This is one reason I love making a Black Forest Cake Recipe the day before a party. Less stress, better slices.
Common Questions
Can I use canned cherry pie filling?
You can, but it is sweeter and thicker than the classic style. If you use it, skip adding sugar to the syrup and use less filling between layers so it does not feel heavy.
Do I have to use sour cherries?
No. Sour cherries are traditional because they balance the chocolate and cream, but sweet cherries work too. Just keep the syrup less sweet so the whole cake does not get sugary.
How do I keep the cake from sliding while stacking?
Chill your layers, do not overdo the syrup, and use a thicker layer of cream as your base. If it still wants to wiggle, stick toothpicks in for support while it chills.
How long does it last in the fridge?
It is best within 2 days, but it can last up to 3 days covered well. The sponge keeps absorbing moisture, so the texture gets softer over time.
Can I freeze Black Forest cake?
You can freeze the chocolate sponge layers easily. I would not freeze the fully assembled cake unless you really need to, because whipped cream can change texture. If you want to prep ahead, freeze the layers and make the cream fresh.
A sweet ending and a little nudge to bake
If you have been wanting a showy dessert that still feels doable, this Black Forest Cake Recipe really hits the spot. You get that rich chocolate, the bright cherry syrup, and the fluffy cream all working together without complicated steps. If you want to compare versions or pick up extra decorating ideas, I like checking guides like Black Forest Cake – Liv for Cake, Black Forest Cake – RecipeTin Eats, and Black Forest Cake Recipe – Natasha’s Kitchen. Now promise me you will actually slice into it while it is nicely chilled, because that first clean slice is so satisfying. Let me know how yours turns out, and do not forget the extra cherries on top. 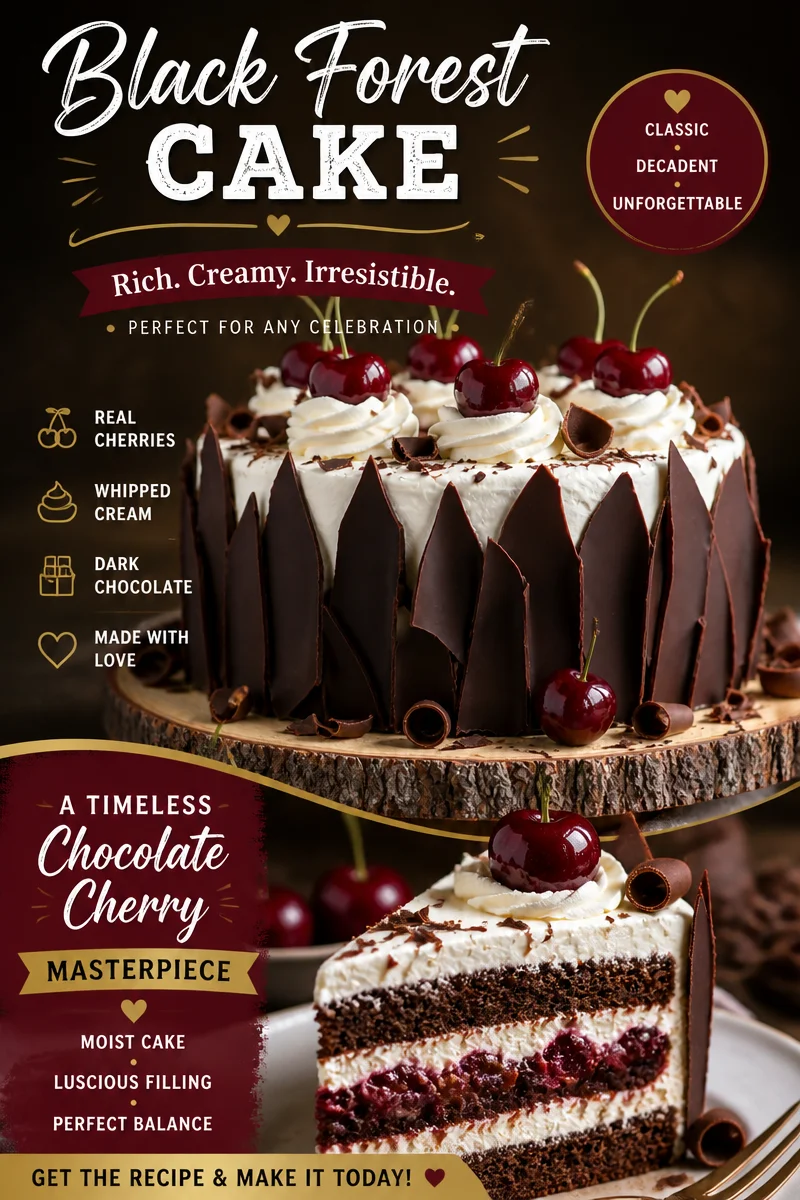
Black Forest Cake
Ingredients
For the sponge cake
- 2 cups all-purpose flour
- 3/4 cup unsweetened cocoa powder for a deep chocolate taste
- 1.5 cups sugar regular white sugar
- 4 large eggs to give lift to the sponge
- 1 teaspoon baking powder helps the cake rise
- 1 teaspoon baking soda helps the cake stay light
- 1 cup buttermilk or milk plus a little lemon juice
- 1/2 cup vegetable oil keeps the sponge moist
- 1 teaspoon vanilla extract
- 1 pinch salt
For the cherry syrup
- 1 cup cherry juice or cherry liquid from the jar
- 2-3 tablespoons sugar to taste based on the sweetness of cherries
- 1 teaspoon cornstarch optional for thickness
For the whipped cream
- 3-4 cups heavy cream cold
- 1/3-1/2 cup powdered sugar to sweeten the cream
- 1-2 teaspoons vanilla extract
For decoration
- 1 bar chocolate for shavings
- 1 cup cherries for topping
Instructions
Preparation of the sponge cake
- Preheat your oven to 350°F (175°C). Grease and line two 8-inch cake pans.
- In one bowl, whisk together flour, cocoa powder, baking powder, baking soda, and salt.
- In another bowl, whisk eggs and sugar until lighter, then whisk in oil, buttermilk, and vanilla.
- Add the dry ingredients and stir until just combined. Pour into pans.
- Bake for about 25 to 32 minutes. A toothpick should come out with a few moist crumbs.
- Cool in pans for 10 minutes, then turn out onto a rack to cool completely.
Making the cherry syrup
- Warm 1 cup of cherry juice with 2-3 tablespoons of sugar in a small pot over low heat.
- Simmer for 3 to 5 minutes. If you want a thicker syrup, whisk in 1 teaspoon of cornstarch mixed with 1 tablespoon of water and cook until glossy.
- Let the syrup cool before brushing on the cake.
Assembling the cake
- Chill your cake layers for about 20 minutes if your kitchen is warm.
- Place the first layer on a plate and brush with cherry syrup.
- Spread a thick layer of whipped cream over the syrup.
- Add cherries on top of the cream.
- Repeat with remaining layers.
- Cover the outside with whipped cream, press chocolate shavings onto the sides, and decorate the top with more cherries.
Making the whipped cream
- Chill your mixing bowl and beaters for 10 minutes.
- Pour in cold heavy cream, add powdered sugar, and a splash of vanilla.
- Beat until thickened and then slow down until you get soft to medium peaks.
- For stability, optional to add instant vanilla pudding mix during whipping.
Chilling the cake
- Once assembled, chill the cake for at least 2 hours; overnight is preferable.