
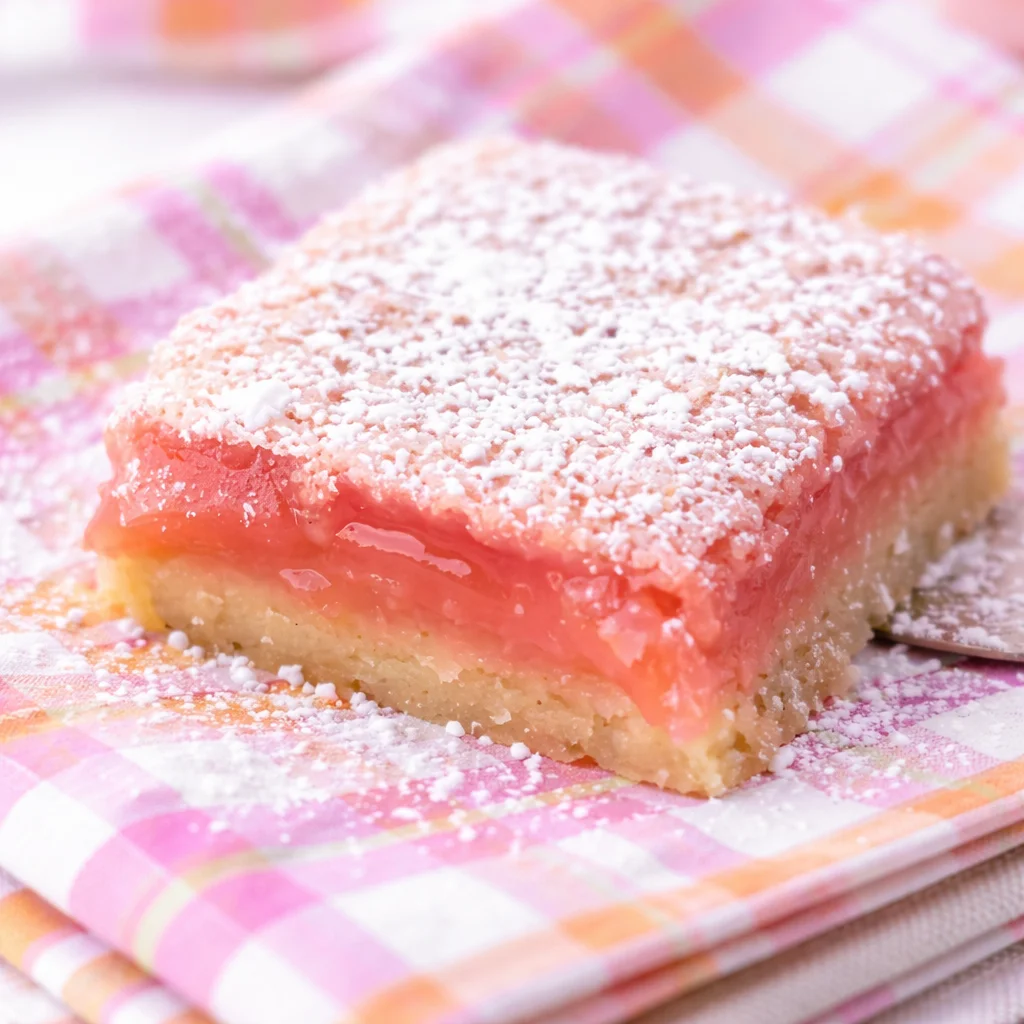
Hibiscus Lemon Bars are what I make when I want something bright and sunny, but regular lemon bars feel a little too predictable. Maybe you have those days too, where you crave a dessert that tastes like a fresh breeze and not just sugar. These bars hit that sweet spot with a tangy lemon bite and a fruity, cranberry like hibiscus kick. They look pretty enough for a get together, but honestly I mostly make them for my own snack plate. If you can stir, whisk, and wait for a pan to cool, you can totally pull these off. 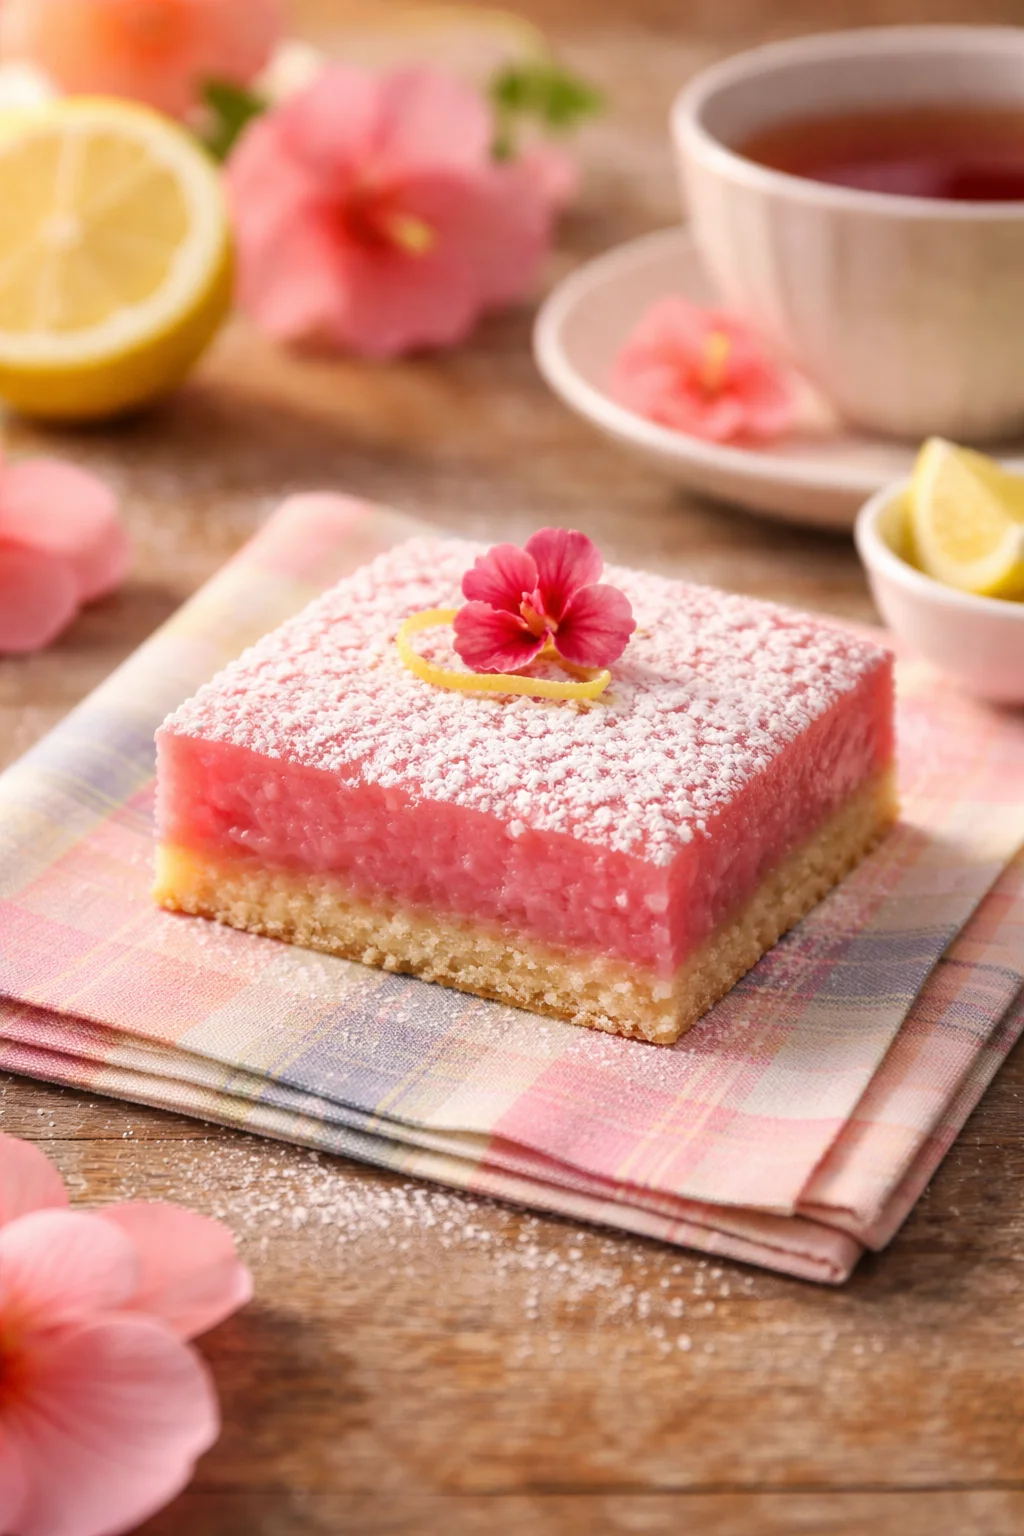
The Evolution of Hibiscus Lemon Bars
I grew up on classic lemon bars, the kind with a buttery shortbread base and a jiggly lemon top that sets into a soft slice. Later, I started messing around with flavors because, well, baking is my stress hobby. I first tried hibiscus in tea, and it instantly reminded me of tart berries and citrus at the same time. That was my lightbulb moment: hibiscus plus lemon could turn the standard bar into something sharper, more interesting, and honestly more fun to serve.
Hibiscus Lemon Bars still follow the same basic idea as the old school version. You bake the crust first, then pour on a lemony filling and bake again until it sets. The hibiscus part can show up in a few ways, but my favorite is steeping dried hibiscus in hot liquid, then using that concentrated ruby tea in the filling. It gives color and flavor without making things complicated.
And if you are on a citrus kick lately, you might also like this chilled and creamy dessert I love for summer weekends: cream cheese lemonade pie. Different vibe, same happy lemon energy.
Tips for Perfect Hibiscus Lemon Bars
I have made these enough times to know where they can go wrong, and also what makes them shine. Here is my no stress approach.
My go to recipe outline (simple but reliable)
I am not going to act like there is only one right way, but this is the method that keeps my bars consistent.
What you will need
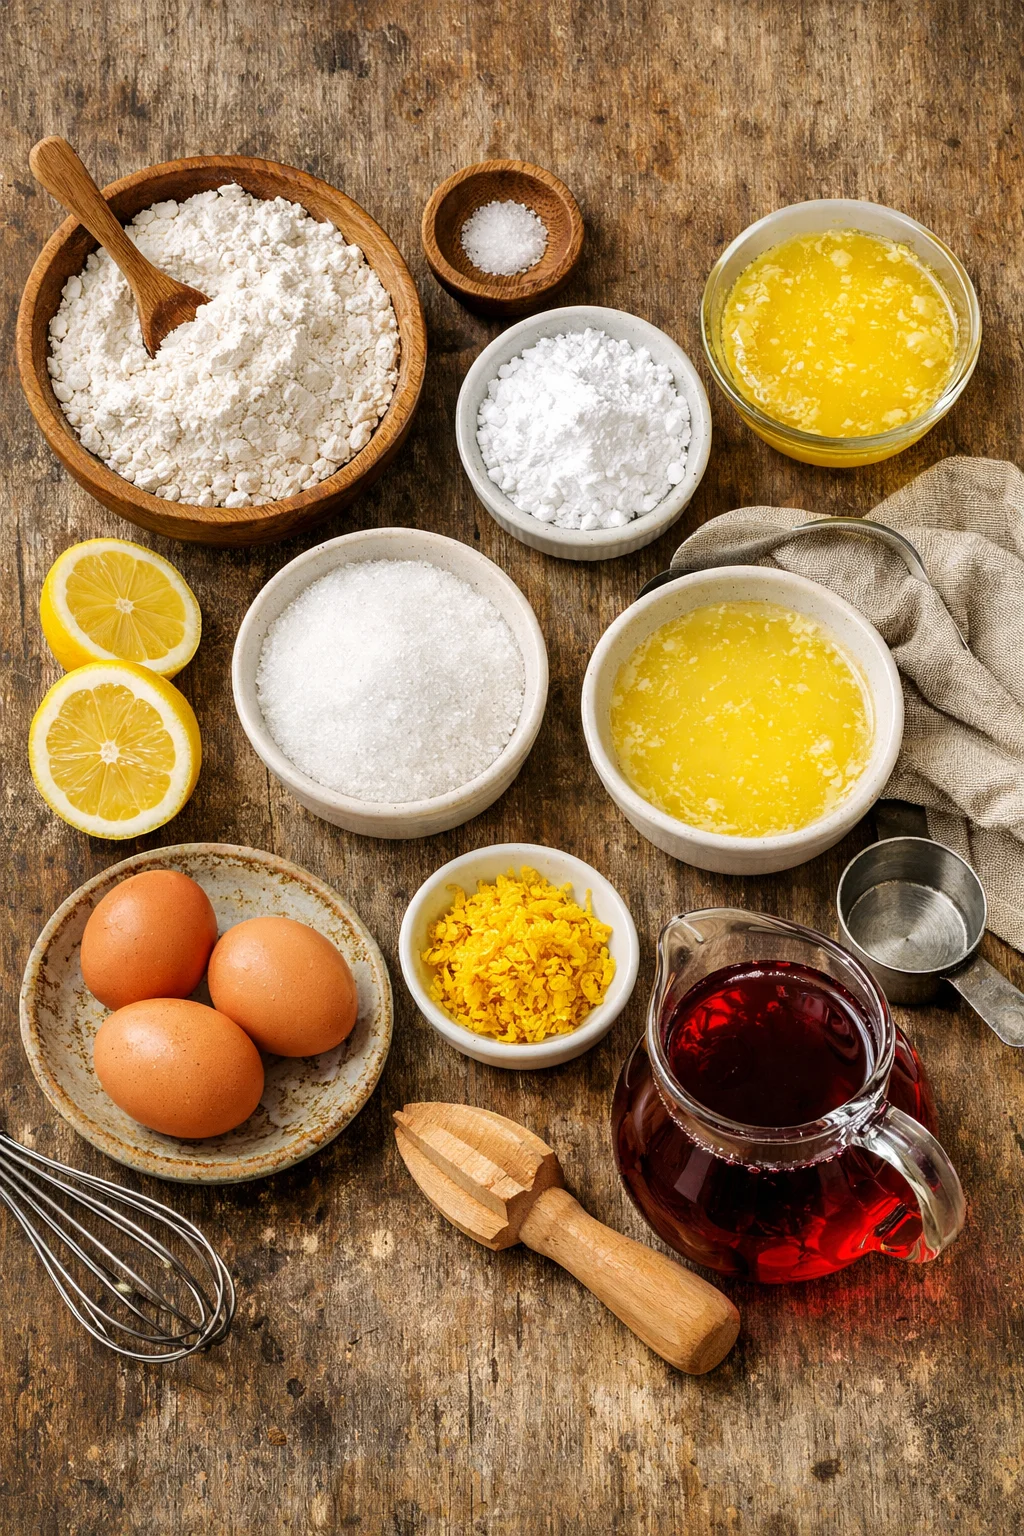
- For the crust: all purpose flour, powdered sugar, salt, and melted or softened butter
- For the filling: granulated sugar, eggs, fresh lemon juice, lemon zest, flour (or a little cornstarch), and strong hibiscus tea (from dried hibiscus)
- Optional: powdered sugar for dusting, extra zest for the top
How I do it
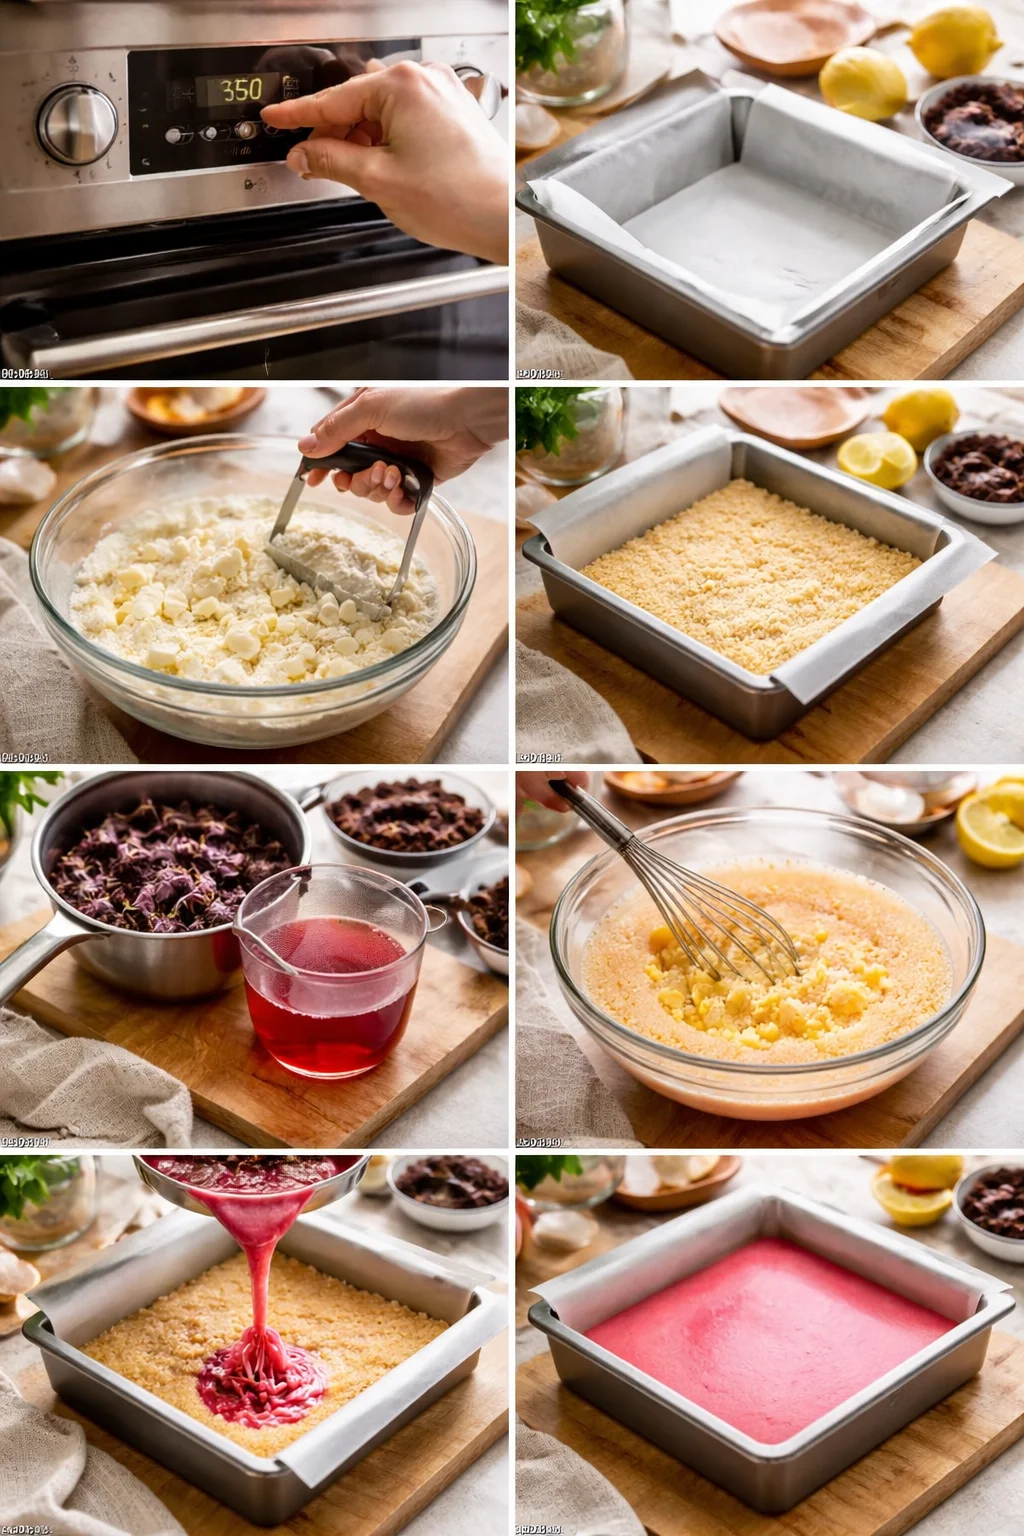
Preheat your oven to 350 F. Line an 8×8 pan with parchment so you can lift the bars out later. Mix crust ingredients until it looks like damp sand, press it firmly into the pan, and bake about 18 to 20 minutes until it looks lightly golden at the edges.
While the crust bakes, steep dried hibiscus in very hot water for about 10 minutes, then strain. You want it strong and tangy. Let it cool a bit so you are not pouring hot liquid into eggs.
Whisk sugar and eggs until smooth, then whisk in lemon juice, lemon zest, and the cooled hibiscus concentrate. Sprinkle in flour and whisk again just until smooth. Pour it over the warm crust and bake about 20 to 25 minutes. You are looking for set edges and a center that barely jiggles when you nudge the pan.
Little details that make a big difference
Use fresh lemon juice. I know it is annoying to squeeze lemons, but bottled juice tastes flat here. Hibiscus is bold, and you need the lemon to be bold too.
Press the crust firmly. If it is loose, it crumbles when you slice. I press with the bottom of a measuring cup and really pack it in.
Cool completely before cutting. This is the hardest part because the kitchen smells so good. But if you cut too soon, you get messy bars that slide around.
Chill for cleaner slices. After cooling to room temp, I pop the pan in the fridge for at least an hour. Then I lift them out and slice.
If you are into dessert bars in general, I also keep this cozy, shareable recipe in my back pocket for potlucks: cinnamon roll bliss bars you will want to share or not. Totally different flavor, but the same easy bar format.
;
Common Mistakes to Avoid
These are the classic hiccups I see when friends try Hibiscus Lemon Bars for the first time. None are tragic, but avoiding them makes the whole experience smoother.
1. Making weak hibiscus tea
If the hibiscus is too mild, it disappears behind the lemon and sugar. Steep it longer or use more dried petals. You want it pleasantly tart when you taste it on its own.
2. Overbaking the filling
If you bake until the center is rock solid, the texture can go a bit rubbery. Pull it when the edges are set and the center still has a gentle jiggle. It will finish setting as it cools.
3. Pouring filling onto a cold crust
I like the crust warm. Not scorching, just warm. It helps everything bond and bake evenly.
4. Cutting with a dull or sticky knife
Wipe your knife between cuts. It sounds fussy, but it is the easiest way to get those clean bakery style squares.
5. Skipping parchment
You can grease the pan, sure. But parchment makes lifting and slicing so much easier, especially if you want neat edges.
“I brought these to a brunch and people kept asking what the fruity tang was. They look fancy but taste even better. I am officially obsessed.” – Jenna, a very honest friend who does not fake compliments
Variations and Serving Suggestions
This is where you can make the recipe feel like yours. Hibiscus Lemon Bars are flexible, and you can keep them simple or dress them up depending on the moment.
Easy variations
- More floral: add a tiny splash of rose water to the filling, like 1/4 teaspoon
- More berry: swirl a spoonful of raspberry jam into the filling before baking
- More zing: add extra lemon zest on top right after baking
- Gluten free option: use a good 1 to 1 gluten free flour blend in both crust and filling
Serving ideas I actually use
I like them chilled with a light dusting of powdered sugar. For a party, I add thin lemon slices or a sprinkle of crushed dried hibiscus on top, just for that pop of color. If I am feeling extra, I serve them with a spoon of whipped cream, because the creamy topping smooths out the tang in the best way.
And if you want another small, snacky lemon moment for your week, these are great for meal prep style nibbling: blueberry and lemon zest cottage cheese bites. Not a bar, but super bright and easy.
Expert Recommendations for Ingredients
I am not a fancy pastry person, but I do care about ingredients because they really show up in a simple recipe like this. Here is what I recommend after a lot of batches and a few oops moments.
Hibiscus: what to buy and how to use it
Look for dried hibiscus labeled as food grade, sometimes called flor de jamaica. It should smell tart and fruity, not dusty. I usually find it in the tea section, the Latin foods aisle, or a local spice shop. Store it in a sealed jar so it stays fragrant.
Quick tip: If your hibiscus tea tastes bitter, it may have steeped too long in boiling water. Try steeping in very hot water, not aggressively boiling, and taste as you go.
Lemons, eggs, and butter: the simple trio that matters
Lemons: Choose ones that feel heavy for their size. That usually means more juice. Zest them before you juice them, always.
Eggs: Use large eggs. If your eggs are tiny, the filling can turn out a bit too firm because there is less liquid.
Butter: Real butter, not margarine. The crust needs that rich flavor. If you use salted butter, just reduce added salt a touch.
One more thing, sugar matters too. Hibiscus brings tang, lemon brings tang, so the sugar is not just sweetness. It balances the whole thing. If you cut sugar too much, the bars can taste sharp in a not so fun way.
And yes, I will say it again because it is the heart of this whole post: Hibiscus Lemon Bars are all about balance. Bold tart notes, enough sweetness, and a crust that holds its own.
Common Questions
Can I make Hibiscus Lemon Bars ahead of time?
Yes, they are actually better after chilling. Make them a day ahead, cover, and refrigerate. Slice right before serving.
Do I have to use dried hibiscus, or can I use a tea bag?
You can use a hibiscus tea bag in a pinch, but dried hibiscus gives stronger flavor and better color. If using tea bags, use two and steep longer.
Why did my crust get soggy?
Usually the crust was underbaked or not pressed firmly enough. Bake until lightly golden at the edges, and press it tight into the pan.
How do I know when the filling is done?
The edges should look set and the center should have a gentle jiggle. If it sloshes, it needs more time. If it is totally stiff in the oven, it may be overbaked.
Can I freeze them?
Yep. Freeze slices on a tray, then wrap and store. Thaw in the fridge for best texture.
A Fresh Little Dessert Win to Brighten Your Week
If you want a treat that feels sunny and different, Hibiscus Lemon Bars are such a fun switch up from the usual lemon square. Keep your hibiscus strong, do not rush the cooling step, and you will get that clean tangy bite with a buttery base. If you want to compare other approaches, I found it helpful to peek at Hibiscus Lemon Bars – The View from Great Island, Hibiscus Lemon Bars recipe – PCC Community Markets, and Hibiscus Lemon Bars – the melodious garden for extra inspiration. Now go grab some lemons, steep that hibiscus, and make a pan for yourself and someone you like. You deserve a dessert that tastes like a fresh twist without making your whole day complicated. 
Hibiscus Lemon Bars
Ingredients
Crust Ingredients
- 1 cup all-purpose flour For the crust
- 1/4 cup powdered sugar For the crust
- 1/4 teaspoon salt For the crust
- 1/2 cup butter melted or softened for the crust
Filling Ingredients
- 1 cup granulated sugar For the filling
- 3 large eggs For the filling
- 1/2 cup fresh lemon juice For the filling
- 1 tablespoon lemon zest For the filling
- 1 tablespoon all-purpose flour For the filling, or replace with a little cornstarch
- 1 cup strong hibiscus tea Use concentrated from dried hibiscus
Optional Ingredients
- 1/4 cup powdered sugar For dusting
- 1 teaspoon lemon zest For topping
Instructions
Preparation
- Preheat your oven to 350°F (175°C). Line an 8x8 pan with parchment paper.
- Mix the crust ingredients until it resembles damp sand, then press it firmly into the lined pan.
- Bake the crust for 18 to 20 minutes until it looks lightly golden at the edges.
- While the crust is baking, steep dried hibiscus in very hot water for about 10 minutes, then strain and let cool.
Making the Filling
- Whisk together sugar and eggs until smooth, then add lemon juice, lemon zest, and the cooled hibiscus concentrate.
- Sprinkle in flour and whisk just until smooth.
- Pour the filling over the warm crust and bake for 20 to 25 minutes, until edges are set and center jiggles gently.
Cooling and Serving
- Cool completely before cutting into squares for neat slices.
- Chill in the refrigerator for at least one hour for cleaner slices.
- Dust with powdered sugar before serving, if desired.