
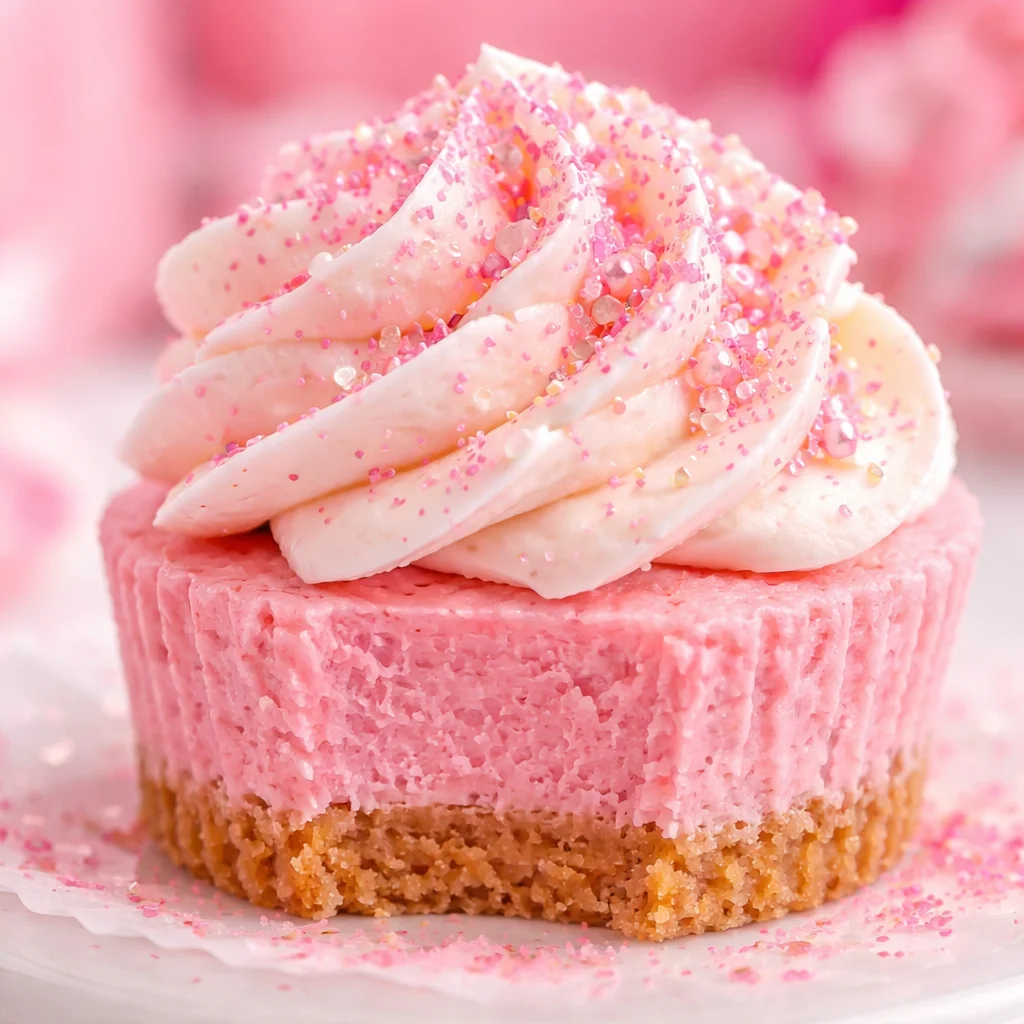
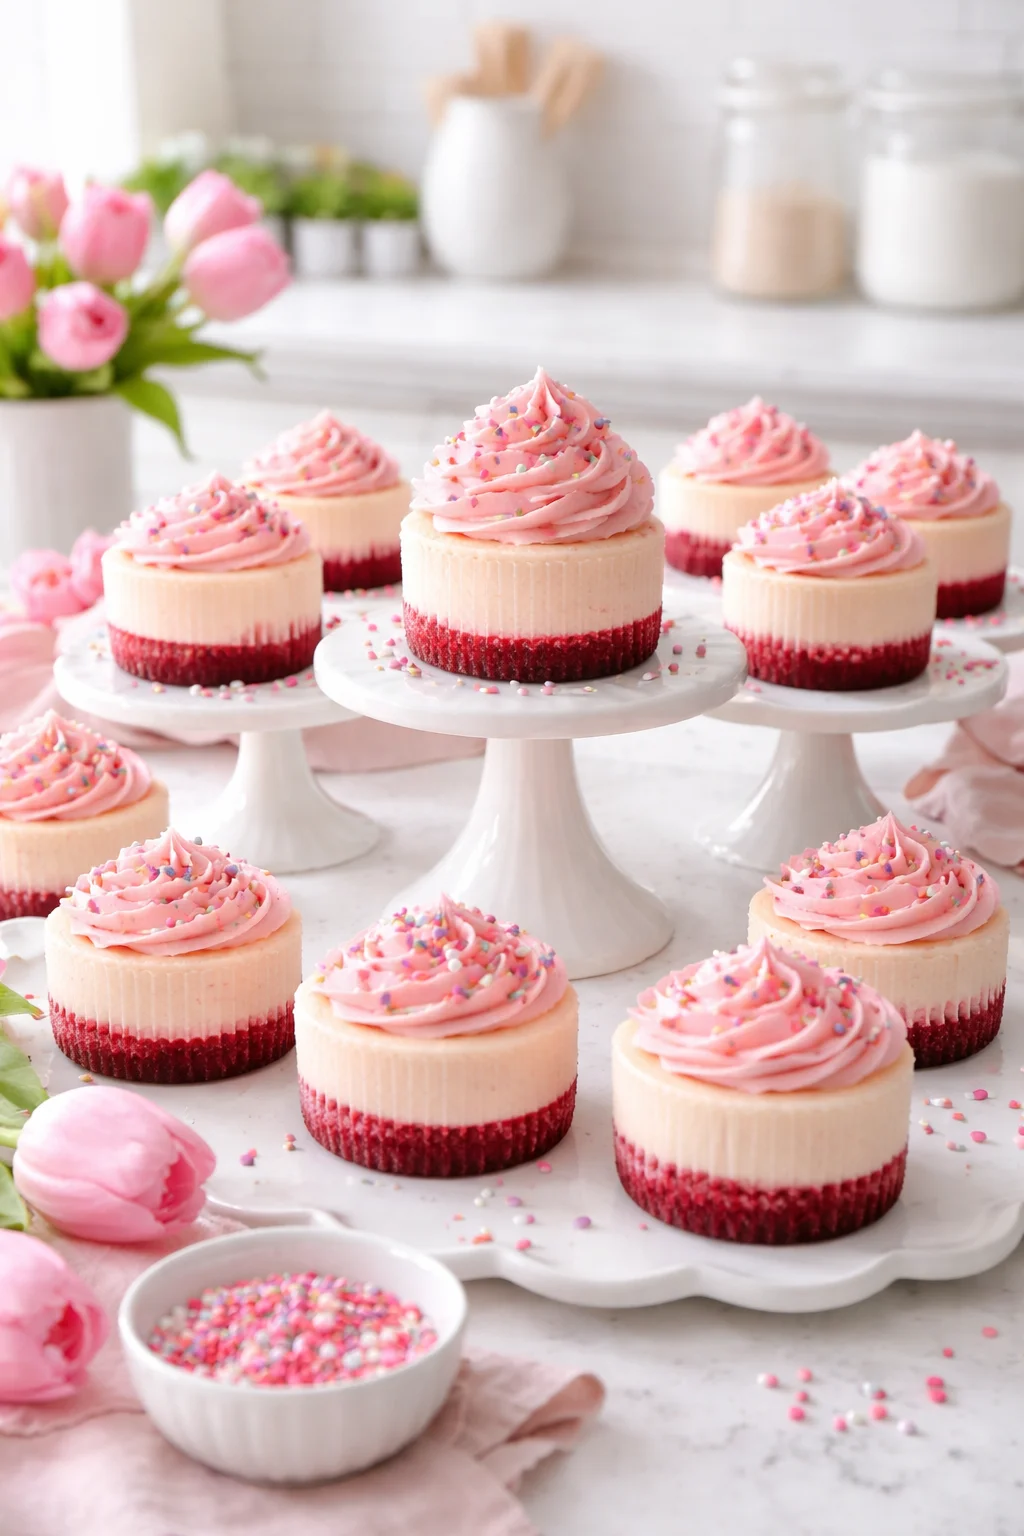
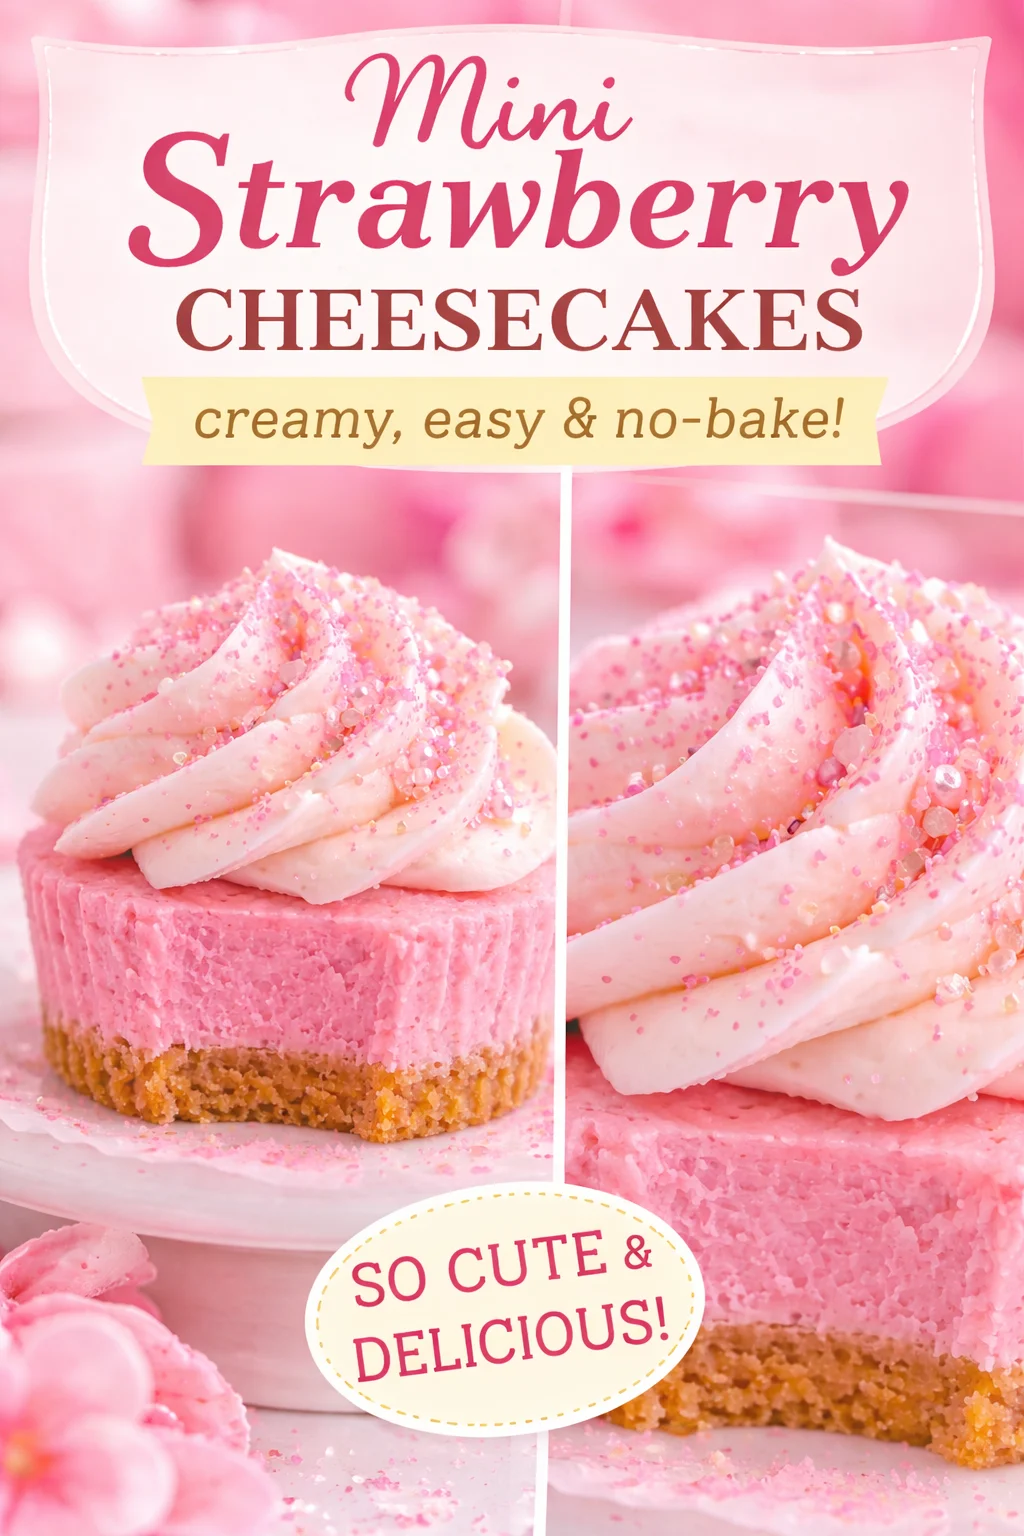
No-Bake Pink Velvet Cheesecake Bites – Creamy Delights are my go to dessert when I want something cute, sweet, and low stress. You know those days when you want to bring a treat to a party, but you do not want to turn on the oven or deal with a complicated recipe? That is exactly where these little bites shine. They taste like a fluffy cheesecake with that classic pink velvet vibe, and they look fancy even if you made them in your pajamas. I started making them for Valentine style get togethers, and now my friends request them all year.
Top Cheesecake Recipes
If you are anything like me, once cheesecake is in the house, it is hard to stop at one bite. I love how you can take the same creamy base and switch the flavor, crust, and toppings depending on your mood. These No-Bake Pink Velvet Cheesecake Bites – Creamy Delights are a big favorite because they are quick, portable, and they do not need any baking drama.
When I am building a dessert table, I like to mix a couple of different cheesecake style treats so people can grab what they want. If you want more ideas, here are a few that fit the same cozy, sweet vibe:
- If you like fun holiday flavors, try these chocolate peppermint cookie cups with creamy cheesecake filling.
- If you want something cinnamon and bakery style, I keep coming back to churro cheesecake.
- And for that rich cocoa craving, this one is a full on comfort dessert: decadent hot chocolate cheesecake you cannot resist.
One quick note from my own trial and error: mini desserts disappear faster than big slices. People feel like they are just having a little taste, and suddenly the plate is empty. So if you are making these for a crowd, do not be shy about doubling the batch.
How to Make No Bake Red Velvet Cheesecake
Even though today we are focused on pink velvet bites, the method is basically the same idea as a no bake red velvet cheesecake. You are making a smooth cream cheese filling, adding color and a little cocoa for that velvet taste, then chilling it until it sets. No oven, no water bath, no cracked tops, just a nice creamy chill.
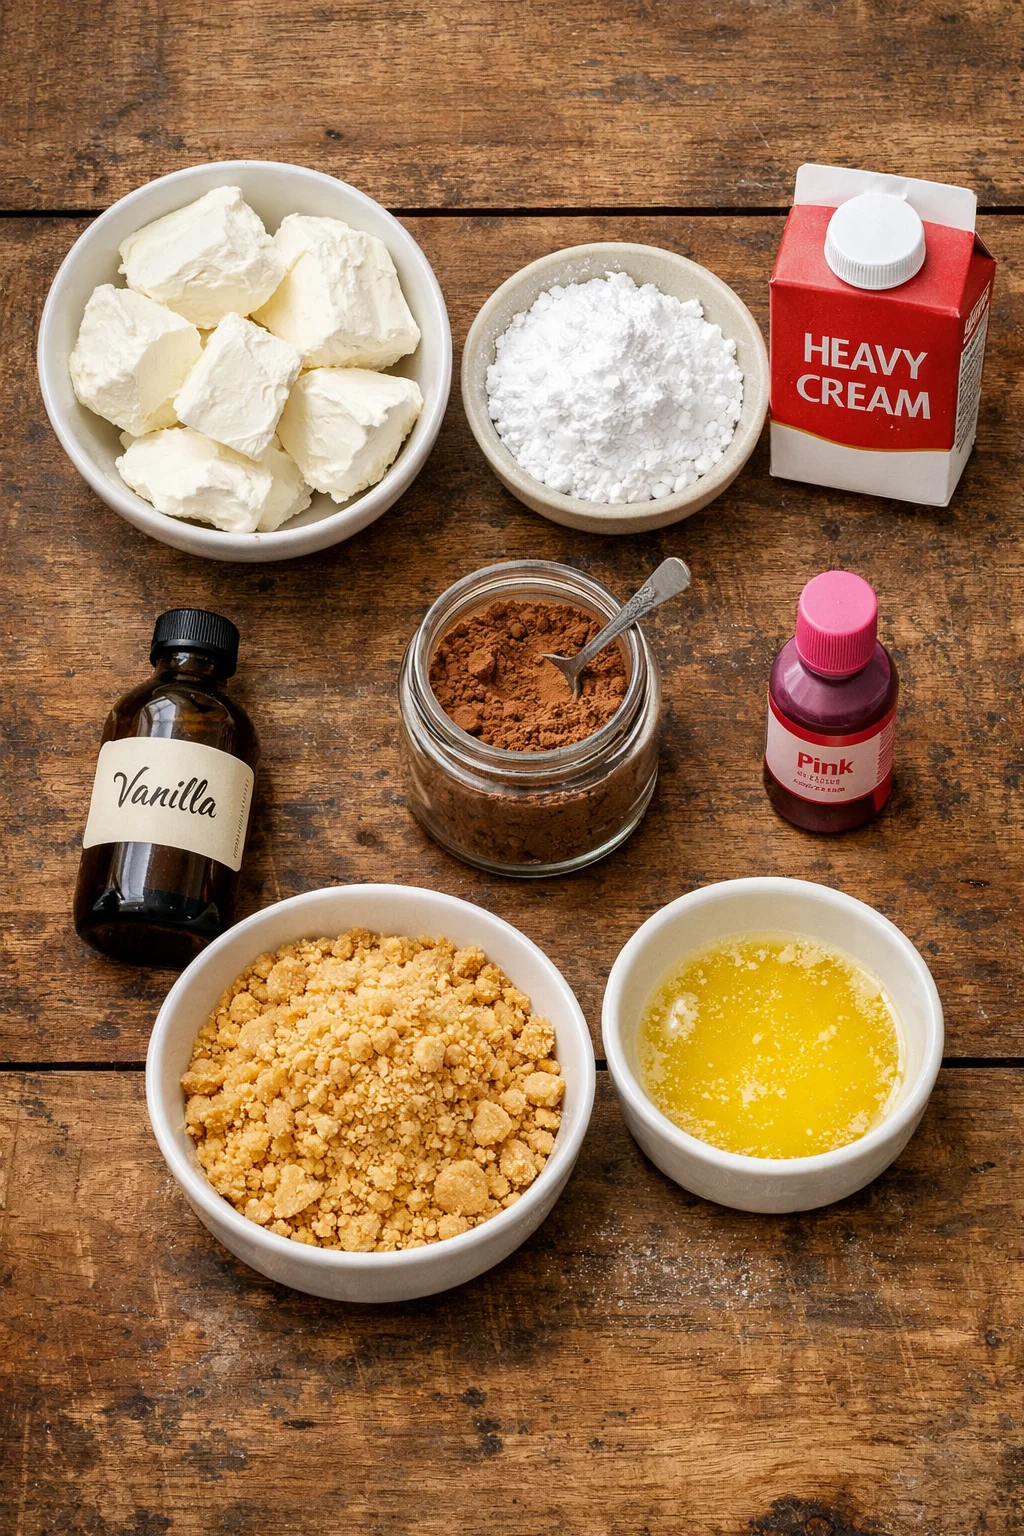
Here is the simple ingredient rundown I use for my bites. Nothing fancy, and you can find it all at a normal grocery store.
What you will need
- Cream cheese, softened so it mixes smoothly
- Powdered sugar for sweetness without graininess
- Heavy cream (or whipped topping if you are in a hurry) for that airy texture
- A splash of vanilla
- 1 to 2 teaspoons cocoa powder for the velvet flavor
- Pink food coloring to get that dreamy shade
- Crumbs for the base, like crushed cookies or graham crackers
- Butter, melted, to hold the crumbs together
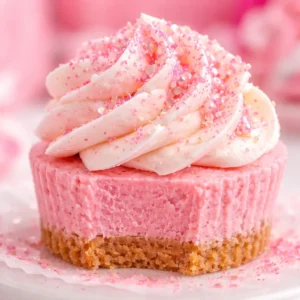
How I do it: I mix the crumbs and butter first, then press them into a mini muffin pan with liners. After that, I beat cream cheese and powdered sugar until it looks creamy and smooth. Then I add vanilla, cocoa powder, and just enough pink coloring to make it look like a soft pastel. Last, I whip the heavy cream separately and fold it in, or I cheat with whipped topping if time is tight.
Chill time matters here. These No-Bake Pink Velvet Cheesecake Bites – Creamy Delights need at least 4 hours in the fridge to hold their shape nicely. Overnight is even better if you can swing it.
Also, a quick texture tip: if your cream cheese is still a bit cold, you can end up with tiny lumps. It still tastes fine, but it will not look as smooth. I let mine sit out about 30 to 45 minutes, then it blends like a dream.
Overview: How to Make Mini No-Bake Cheesecakes
This is the part I wish someone had explained to me the first time I tried mini cheesecakes. Mini no bake cheesecakes are basically a three part deal: a crumb base, a creamy filling, and a chill. Once you get that down, you can make so many variations without stress.
Here is my simple step by step flow for these bites:
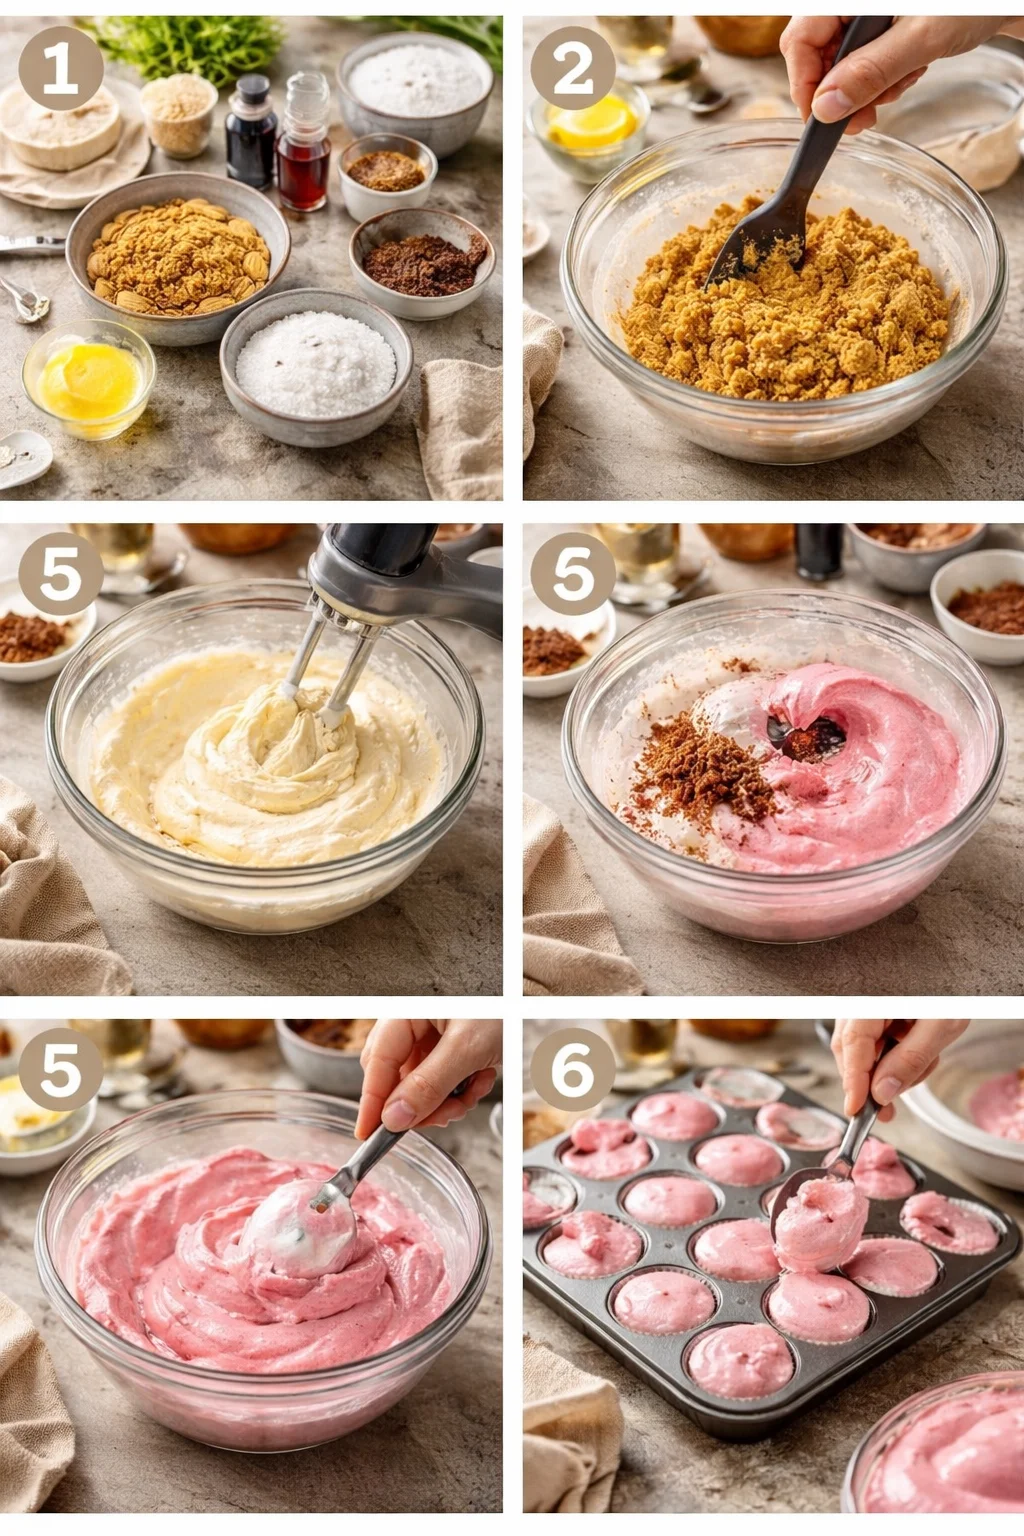
Step 1: Prep the pan
Line a mini muffin tin with paper liners. If you do not have liners, lightly grease the pan, but liners make life easier for clean removal.
Step 2: Make the crust
Mix cookie crumbs with melted butter until it looks like wet sand. Press a little into each cup. I use the back of a teaspoon to pack it down.
Step 3: Make the filling
Beat cream cheese and powdered sugar until smooth. Mix in vanilla, cocoa powder, and pink coloring. Fold in whipped cream for a light and creamy finish.
Step 4: Fill and chill
Spoon or pipe the filling into each crust. Smooth the tops, then chill until firm.
I like piping because it looks neat, but spooning works totally fine. If you want a super tidy look without a piping bag, use a zip top bag and snip off the corner. Instant DIY piping bag.
And because I always appreciate hearing from real people before I try a recipe, here is a message a friend sent me after I brought these to game night:
“I honestly thought you bought these from a bakery. They were so creamy and the pink color was adorable. I ate three before I even realized it.”
That is basically the danger of mini treats. They are too easy to grab.
Toppings for Mini No-Bake Cheesecakes
Toppings are where you can make these bites look extra special without doing a lot more work. The base flavor is already sweet and creamy, so you just want something that adds a little texture or a pop of flavor. I usually top them right before serving so everything looks fresh.
My favorite topping ideas
1) White chocolate curls or a drizzle of melted white chocolate. This makes them feel fancy with almost no effort.
2) Crushed cookies. If you use sandwich cookies for the crust, sprinkle a little extra on top for a cute matchy look.
3) Fresh berries. Raspberries look especially pretty with the pink filling, and the tartness balances the sweetness.
4) Whipped cream. A tiny swirl on each bite is always a win.
5) Sprinkles. For birthdays or Valentine parties, sprinkles make them feel fun and festive.
If you are making a whole dessert spread, these pair really well with other no bake treats. I have served them alongside no bake PBJ cheesecake squares you will crave, and it was such a cute mix of flavors.
One more tiny practical tip: if you are using berries, pat them dry first. Extra moisture can make the tops look a little wet, especially after sitting in the fridge.
3 Final Success Tips
I have made these No-Bake Pink Velvet Cheesecake Bites – Creamy Delights enough times to learn what actually matters. Here are my three biggest tips to help you get the best result on your first try.
1) Chill longer than you think
They might look set after two hours, but the texture gets better with more time. If you want clean, bakery style bites, aim for at least four hours, or overnight.
2) Do not overdo the food coloring
It is tempting to keep adding drops, but color deepens a bit as it mixes. Start with a tiny amount, mix, then decide. That soft pink is what makes these feel dreamy.
3) Keep your cream cheese soft, not melted
If it is too cold, you will fight lumps. If it is melted, the filling can turn runny. Room temp is the sweet spot. I set mine out while I crush the cookies and line the pan.
And if you want to make them ahead, you absolutely can. I store them in the fridge in a covered container. They stay great for about 3 days, though they rarely last that long in my house.
Common Questions
Can I freeze these cheesecake bites?
Yes. Freeze them on a tray first, then move to a sealed container. Thaw in the fridge for a few hours before serving.
What if I do not have a mini muffin pan?
You can make them in a regular muffin tin for bigger portions, or press the crust and filling into a small pan and slice into squares later.
How do I make them more “velvet” flavored?
Add a little extra cocoa powder, but not too much or it will taste like chocolate cheesecake. Start small and taste as you go.
Can I use low fat cream cheese?
You can, but the texture is usually softer and less rich. Full fat sets better for No-Bake Pink Velvet Cheesecake Bites – Creamy Delights.
Do I need gelatin?
Nope. If you chill them long enough and use whipped cream or whipped topping, they hold up nicely without gelatin.
A sweet little sign off and a few helpful resources
If you want a dessert that looks adorable, tastes like a creamy cloud, and does not mess up your kitchen, these No-Bake Pink Velvet Cheesecake Bites – Creamy Delights are the move. Focus on a firm crust, a smooth filling, and a good long chill, and you will be set. If you feel like going down a cheesecake rabbit hole, I love browsing Cheesecake – Sally’s Baking Addiction for inspiration. And if you want to compare methods, this No Bake Red Velvet Cheesecake – Taste and Tell is a great reference for the classic flavor idea. For more mini dessert fun, check out Mini No-Bake Cheesecakes – Sally’s Baking Addiction and then come back and make yours pink and pretty.
Try them once, and I promise you will start thinking of excuses to make them again. Save a few in the fridge for a late night snack, and do not be surprised when they disappear fast.
No-Bake Pink Velvet Cheesecake Bites
Ingredients
Crust
- 1 cup crumbs (crushed cookies or graham crackers)
- 1/4 cup butter, melted To hold the crumbs together
Filling
- 8 oz cream cheese, softened Let sit at room temperature for 30 to 45 minutes for smooth mixing
- 1/2 cup powdered sugar For sweetness without graininess
- 1 cup heavy cream Can substitute with whipped topping for quicker preparation
- 1 tsp vanilla extract
- 1 to 2 teaspoons cocoa powder For velvet flavor
- a few drops pink food coloring Add to achieve desired color
Instructions
Preparation of Crust
- Line a mini muffin tin with paper liners or lightly grease the pan.
- Mix the cookie crumbs with melted butter until it resembles wet sand.
- Press the mixture into each muffin cup and pack it down firmly.
Preparation of Filling
- Beat the softened cream cheese and powdered sugar together until smooth.
- Add vanilla, cocoa powder, and pink food coloring to the cream cheese mixture.
- In a separate bowl, whip the heavy cream until stiff peaks form, then fold it into the cream cheese mixture.
Assembly and Chilling
- Spoon or pipe the filling into each crust, smoothing the tops.
- Chill in the refrigerator for at least 4 hours, preferably overnight, until firm.