
Healthy Homemade Butterfingers are basically my answer to that very specific problem where you want a crunchy candy bar moment, but you also do not want to feel like you just ate a brick of sugar. I used to be the person who would buy a fun size pack, eat three, and then keep thinking about them all day. So I started playing around in my kitchen until I landed on a version that hits the same sweet, crispy, peanut buttery vibe. It is simple, it is doable, and you do not need fancy tools. If you have a bowl, a spoon, and a little patience while chocolate sets, you are in business.
Why Go Homemade?
I love a good store bought treat, but candy bars can be a little wild when you look at the ingredient list. When I make Healthy Homemade Butterfingers at home, I know exactly what went in, and I can tweak things based on what I have in the pantry.
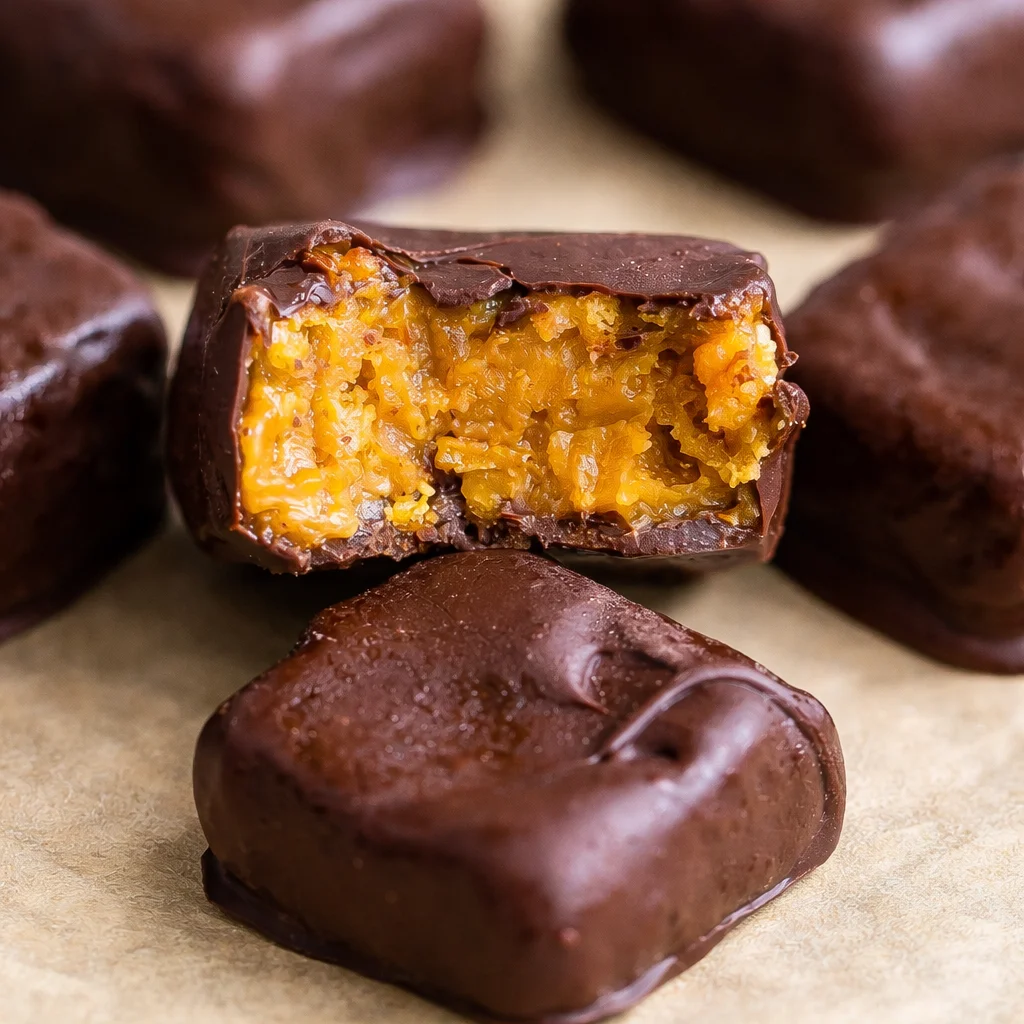
Homemade also solves the classic candy bar complaint: you eat one and somehow it is gone in 30 seconds. With these, I cut them into small bites, so it actually feels like a treat you can savor. Plus, the crunchy centers are honestly fresher tasting than anything that has been sitting in a wrapper for months.
And if you are into meal prep snacks, these are a win. I make a batch on Sunday, stash them in the fridge, and I have a sweet bite ready when that afternoon snack craving hits. If you like having other make ahead snacks around too, I am obsessed with these protein cottage cheesecake jars for the same reason.
Healthier Butterfingers Ingredients
Let us talk about what makes these feel a little lighter while still tasting like a real treat. The goal is not to make “diet candy.” The goal is to make something that still feels fun, but with ingredients that make sense and actually taste good.
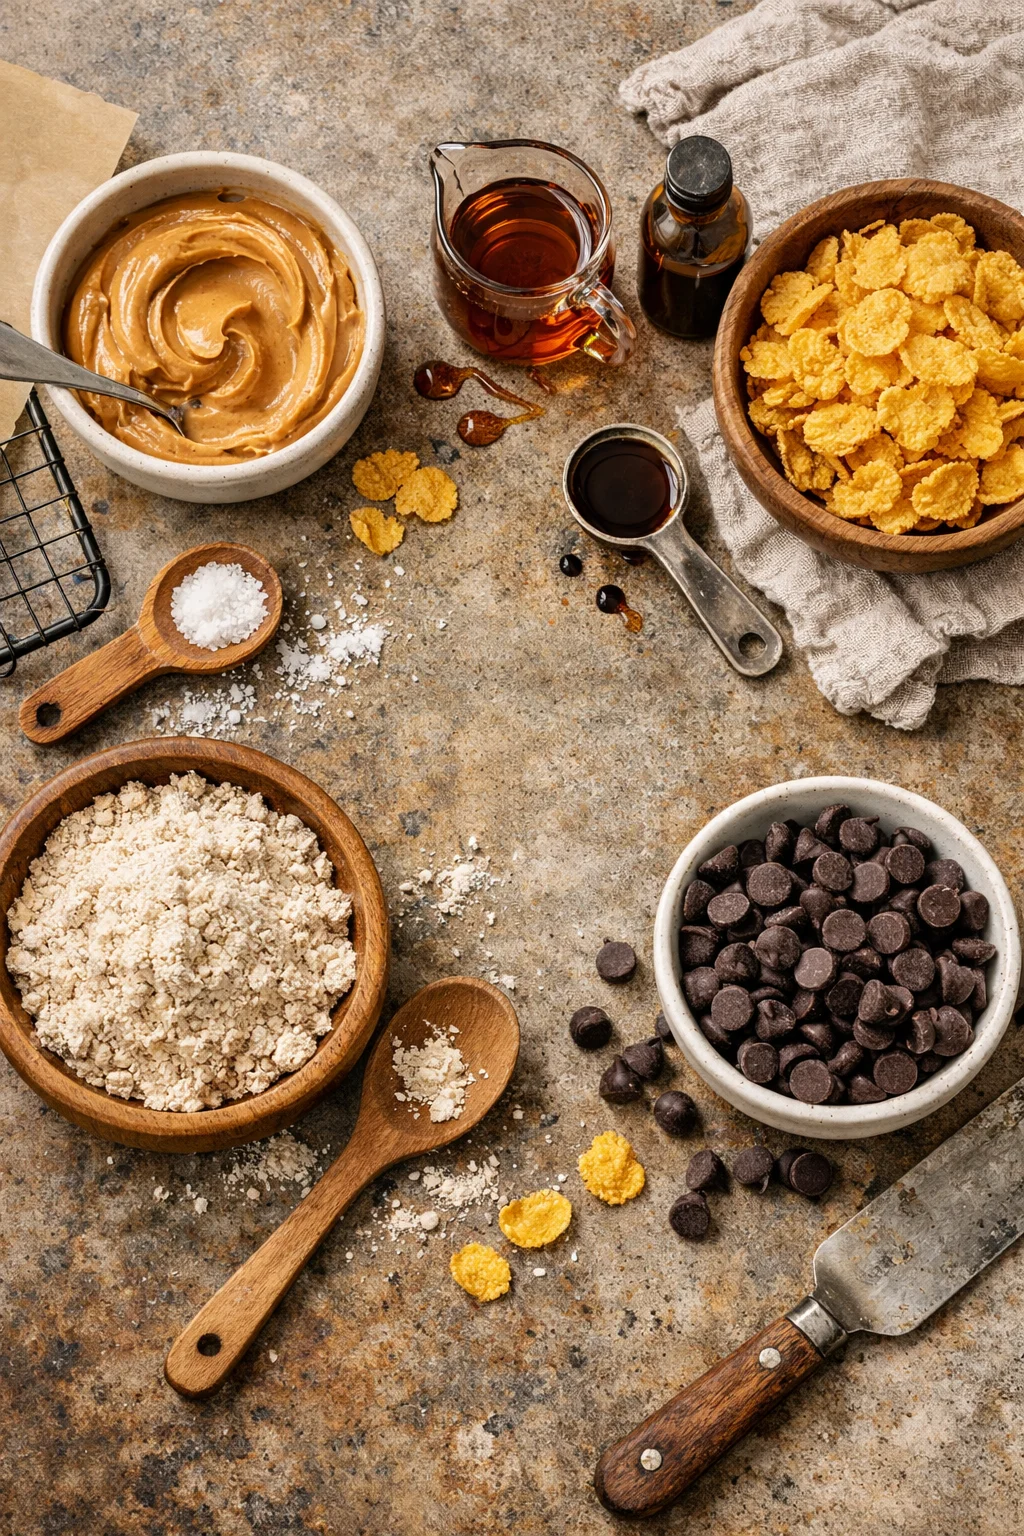
My go to ingredient list
- Natural peanut butter (creamy works best for mixing)
- Maple syrup for sweetness and a little stickiness
- Vanilla extract (tiny splash, big payoff)
- Oat flour (or finely blended oats)
- Cornflakes for that classic crispy crunch
- Pinch of salt to keep the sweetness balanced
- Dark chocolate (chips or a chopped bar) for coating
- Optional: a little coconut oil to thin the chocolate
A quick note on cornflakes: they are the whole secret to that “shatter” bite. Rice cereal works in a pinch, but cornflakes give you those slightly bigger crunchy layers that feel more like the real thing.
Also, choose a peanut butter you like by the spoonful. It matters. If it is super runny, you may need a touch more oat flour to get the center to hold together. If it is thick and dry, it helps to warm it for about 10 seconds so it mixes smoothly.
How to Make Homemade Butterfingers
This is the part where you realize you can totally do this on a random weeknight. The main idea is: mix, crunch, shape, chill, dip, chill again. That is it.
Step by step directions
- Line a small baking sheet or plate with parchment paper.
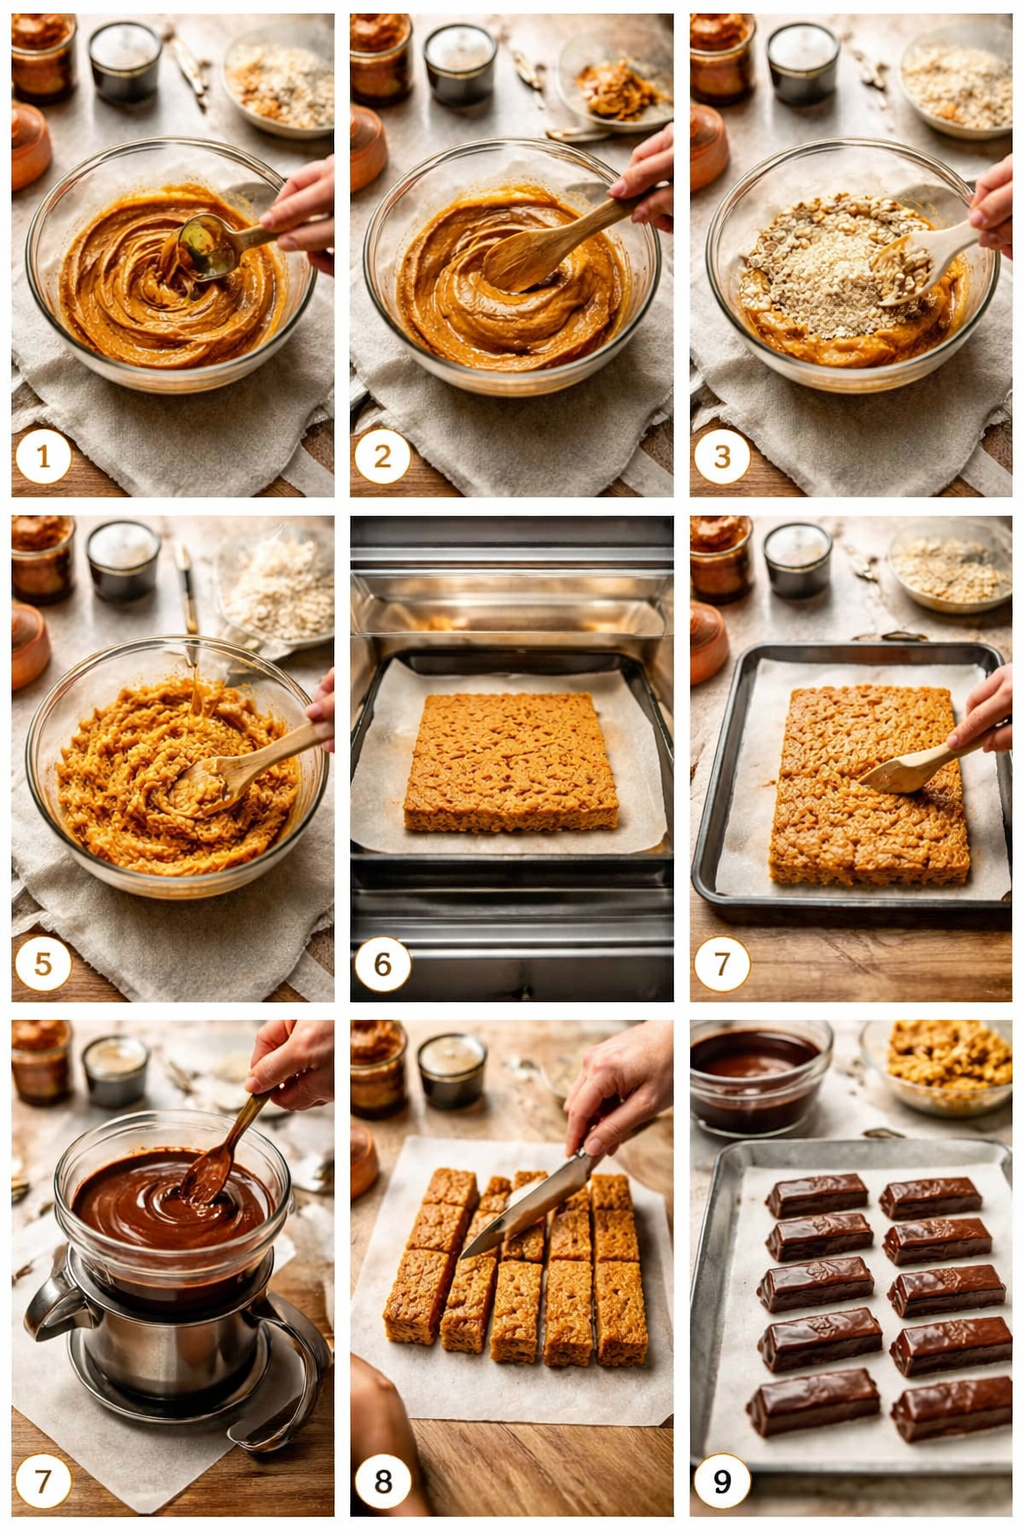
- In a bowl, mix peanut butter, maple syrup, vanilla, and salt until smooth.
- Stir in oat flour until it looks like a thick dough.
- Gently fold in cornflakes, trying not to crush them too much.
- Press the mixture into a rectangle about half an inch thick, or roll into bite size pieces.
- Chill for 20 to 30 minutes so it firms up.
- Melt dark chocolate, adding a little coconut oil if you want it smoother.
- Dip each piece, let excess drip off, then place back on parchment.
- Chill again until chocolate is set.
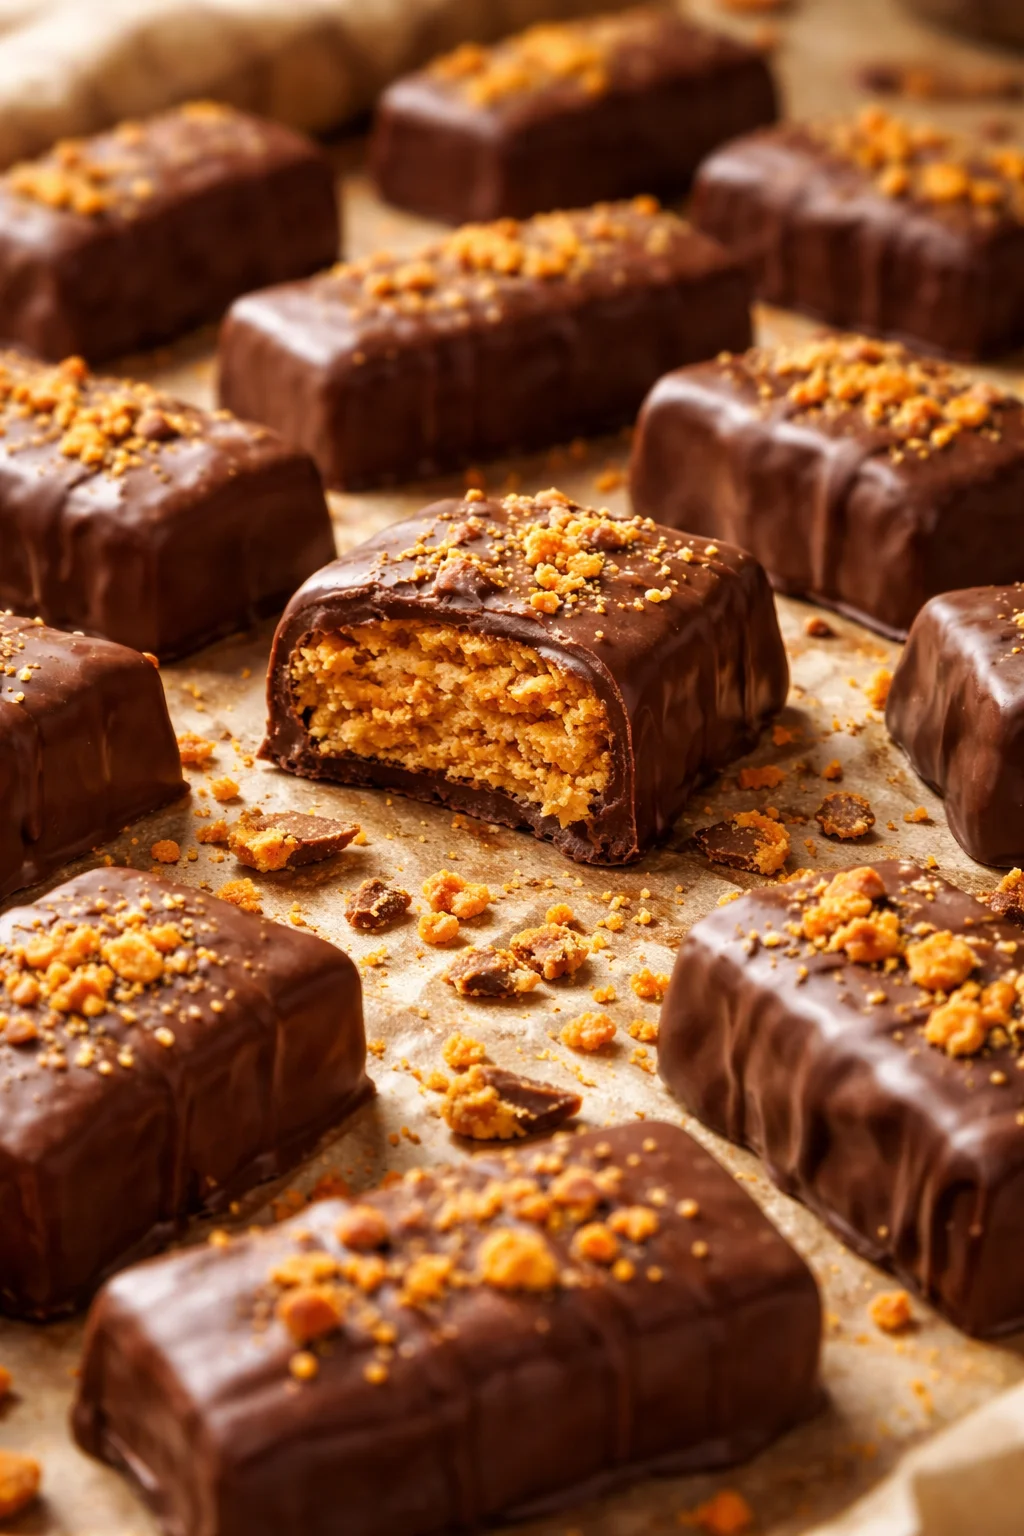
If you are shaping these into bars, use a sharp knife and wipe it between cuts for clean edges. If you are doing bites, I love using a small cookie scoop so they are all the same size and set evenly.
One more tip from my own impatience: do not skip that first chill. If the centers are warm and soft, the chocolate coating turns into a messy situation. Still tasty, but messy.
“I made these for my kids and my husband kept stealing them out of the fridge. They taste like the candy bar we grew up with, but I feel way better serving them.”
When I am in a candy making mood, I usually pair it with something cozy to drink. A warm mug of homemade chai tea latte + a couple of these bites is a legit night in.
How to Store Healthy Butterfinger Bites
These store really well, which is dangerous knowledge, but also super convenient.
Here is what works best in my kitchen:
Fridge: Store in an airtight container for up to 1 week. The crunch holds up great, and the chocolate stays snappy.
Freezer: Freeze for up to 2 months. I like freezing them on a tray first, then transferring to a bag. You can eat them straight from the freezer if you like a firmer bite, or let them sit on the counter for 5 minutes.
Room temp: Only if your kitchen is cool. Otherwise, the chocolate can get soft and fingerprints happen fast.
Little serving suggestion: if you are packing lunchboxes, wrap a few pieces in parchment so they do not stick together. And if you want another fun dessert to rotate in, this raspberry and cream angel food cake is sweet but still feels light.
What Can I Use Instead of Maple Syrup?
If you are out of maple syrup, you still have options. The goal is a sticky sweetener that helps bind the filling.
Easy swaps that work
Honey: This is the closest swap. It is sticky and sweet, and it mixes well with peanut butter. It will taste a little more “honey” obviously, but still really good.
Brown rice syrup: If you want less sweetness and more chew, this is a good one. It is super sticky and mild. The center ends up a bit more like classic candy texture.
Agave: Works fine, just know it is thinner, so you may need a bit more oat flour to firm up the mixture.
Date syrup: Deeper, caramel like flavor. Delicious with dark chocolate, but again it can be thinner depending on the brand.
If you go with a thinner sweetener, just add oat flour a teaspoon at a time until the mixture holds together when you press it.
Once you get the hang of it, you can adjust the sweetness too. That is one reason I keep coming back to Healthy Homemade Butterfingers instead of buying candy bars. You can make them your kind of sweet.
Common Questions
Can I make these nut free?
Yes. Use sunflower seed butter. The flavor is a little different, but still tasty with chocolate and crunch.
Why are my centers crumbly?
Usually not enough sticky sweetener or the peanut butter was too dry. Add 1 to 2 teaspoons of maple syrup (or honey) and mix again.
Do I have to use oat flour?
No. You can blend rolled oats into a fine powder. In a pinch, almond flour works too, but the texture will be a little softer.
What chocolate is best for coating?
I like dark chocolate chips or a chopped dark chocolate bar. If it is too thick when melted, add a tiny spoon of coconut oil.
How do I keep the cornflakes crunchy?
Fold them in gently at the end and do not overmix. Also store the finished bites in the fridge in a sealed container.
A sweet little wrap up before you start
If you have been craving that classic crunchy candy bar vibe, Healthy Homemade Butterfingers are such a fun weekend project or quick weeknight treat. You get the crisp, peanut buttery center, a rich chocolate coating, and the satisfaction of knowing what is actually in them. If you want to compare versions, I found it helpful to check out Healthy Butterfingers! – Chocolate Covered Katie, Easy Healthier Butterfingers – Eating Bird Food, and Healthy Copycat Butterfingers – Cooking Katie Lady for extra ideas on sweeteners and textures. Make a batch, stash them in the fridge, and tell me if you are a bar person or a bite person. Either way, you are about to have a very good snack moment.


Healthy Homemade Butterfingers
Ingredients
Base Ingredients
- 1 cup Natural peanut butter Creamy works best for mixing
- 1/4 cup Maple syrup For sweetness and stickiness
- 1 tsp Vanilla extract A tiny splash for flavor
- 1 cup Oat flour Or finely blended oats
- 2 cups Cornflakes For the classic crispy crunch
- 1 pinch Salt To balance sweetness
Coating
- 1 cup Dark chocolate Chips or a chopped bar, add coconut oil if desired
- 1-2 tsp Coconut oil Optional, to thin the chocolate
Instructions
Preparation
- Line a small baking sheet or plate with parchment paper.
- In a bowl, mix peanut butter, maple syrup, vanilla, and salt until smooth.
- Stir in oat flour until it looks like a thick dough.
- Gently fold in cornflakes, trying not to crush them too much.
- Press the mixture into a rectangle about half an inch thick, or roll into bite-size pieces.
- Chill for 20 to 30 minutes so it firms up.
Coating
- Melt dark chocolate, adding a little coconut oil if you want it smoother.
- Dip each piece, let excess drip off, then place back on parchment.
- Chill again until chocolate is set.