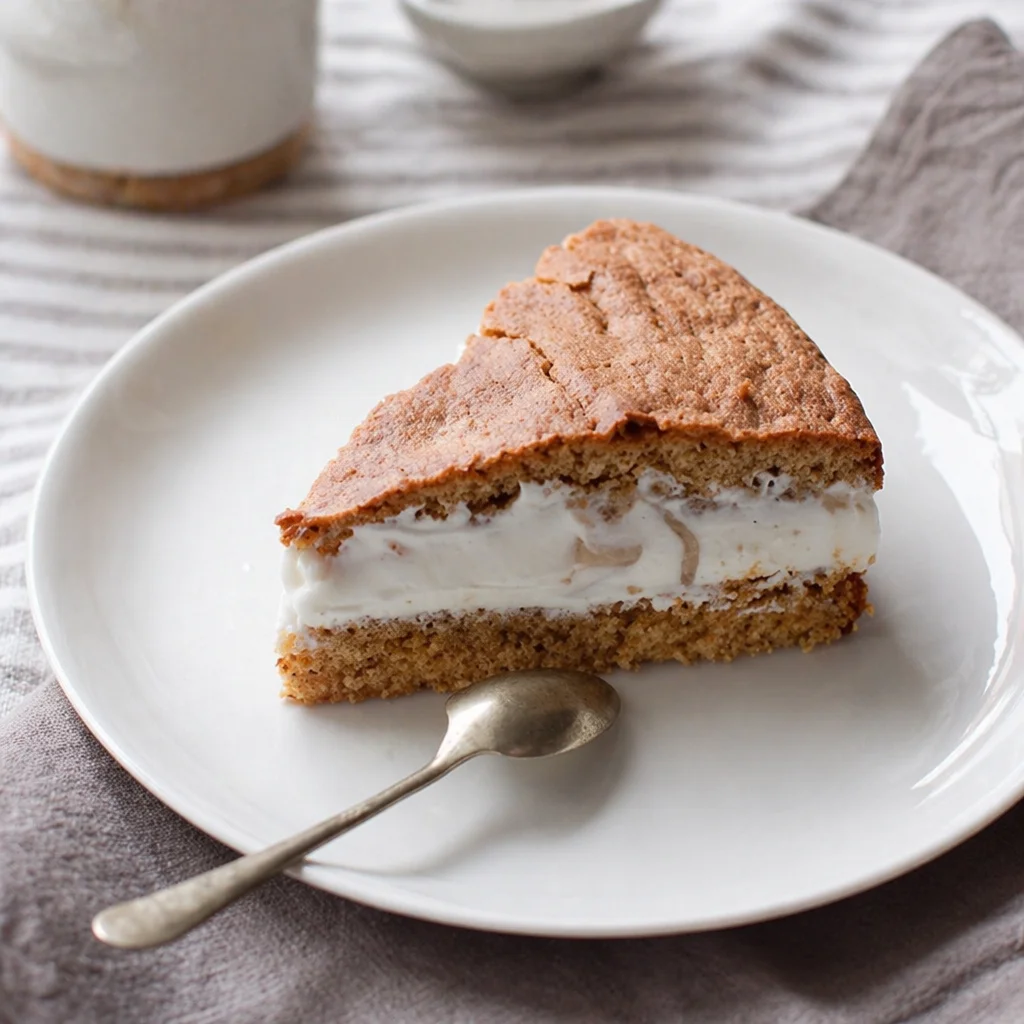
Gluten-free cakes trending are basically everywhere right now, and I get why. You want something sweet and cozy, but you also want to feel good after dessert, not like you need a nap and a new pair of stretchy pants. I started baking gluten free more often when a friend told me wheat makes her feel puffy and tired, and honestly I got curious. The surprise for me was this: you can still get that rich, bakery style bite without regular flour. Today I am walking you through my current obsession, chocolate lava cakes that are crisp on the outside and molten in the middle. 
Benefits of Gluten-Free Baking
Let me say this upfront: gluten free is not automatically “healthy,” but it can be a smart choice depending on your body and your goals. For people with celiac disease or gluten sensitivity, it is a must. For everyone else, it can be a fun way to explore different grains and textures, and it can help you bake for more people without stress.
Here is what I personally love about gluten-free cakes trending right now:
- You can still do rich, classic desserts like lava cakes, coffee cake, and mini cakes without feeling like you are missing out.
- They can be easier on the stomach for some folks, especially when you keep ingredients simple.
- The flavors pop because you start paying attention to chocolate quality, vanilla, butter, and add ins instead of leaning on flour to do all the work.
- It is more inclusive for gatherings. Nobody wants to be the only person skipping dessert.
If you are building a little gluten free dessert rotation, you might also like this cozy bake: decadent gluten-free cinnamon coffee cake youll love. I make it when I want something sliceable for brunch or snacking.
Essential Ingredients for Gluten-Free Chocolate Lava Cakes
These lava cakes are one of my favorite “looks fancy but is actually easy” desserts. The ingredient list is short, so quality matters. This is also where a lot of gluten-free cakes trending online go wrong, because people swap things randomly and then blame gluten free baking. You do not need a complicated blend here. You just need the right basics.
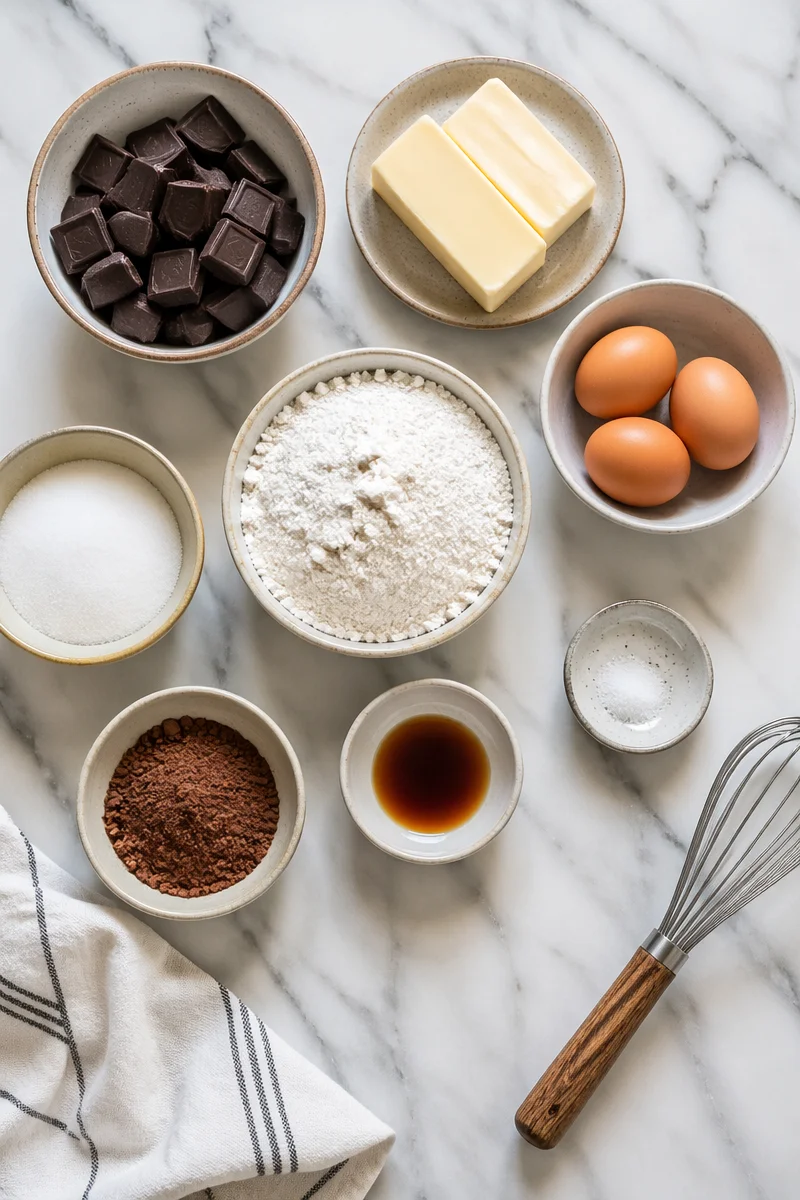
What you will need
- Bittersweet chocolate (around 60 to 70 percent). This gives deep flavor without being too sweet.
- Unsalted butter. Butter helps the cakes set around the edges while staying gooey inside.
- Eggs plus one extra yolk if you want a richer center.
- Sugar. Regular granulated sugar is totally fine.
- Gluten free flour. I usually use a simple 1 to 1 flour blend, or almond flour if I want it extra tender.
- Cocoa powder for dusting the ramekins, so the cakes release cleanly.
- Salt and vanilla. Small details, big payoff.
A quick note on the flour: for lava cakes, you do not need much. That is why this dessert is such a win if you are new to gluten free baking. The structure mostly comes from eggs and chocolate. Flour is just there to give it a soft little cake body.
If you want another cute dessert idea for parties, I have been eyeing these: delicious mini cheesecakes topped with chocolate covered strawberries. Not lava cake, but still very “wow” for how easy they are.
Step-by-Step Guide to Making Perfect Lava Cakes
This is the part where I talk you through it like you are in my kitchen, leaning on the counter, waiting for the chocolate to melt. The goal is simple: baked edges, warm middle, and zero stress.
My no panic method
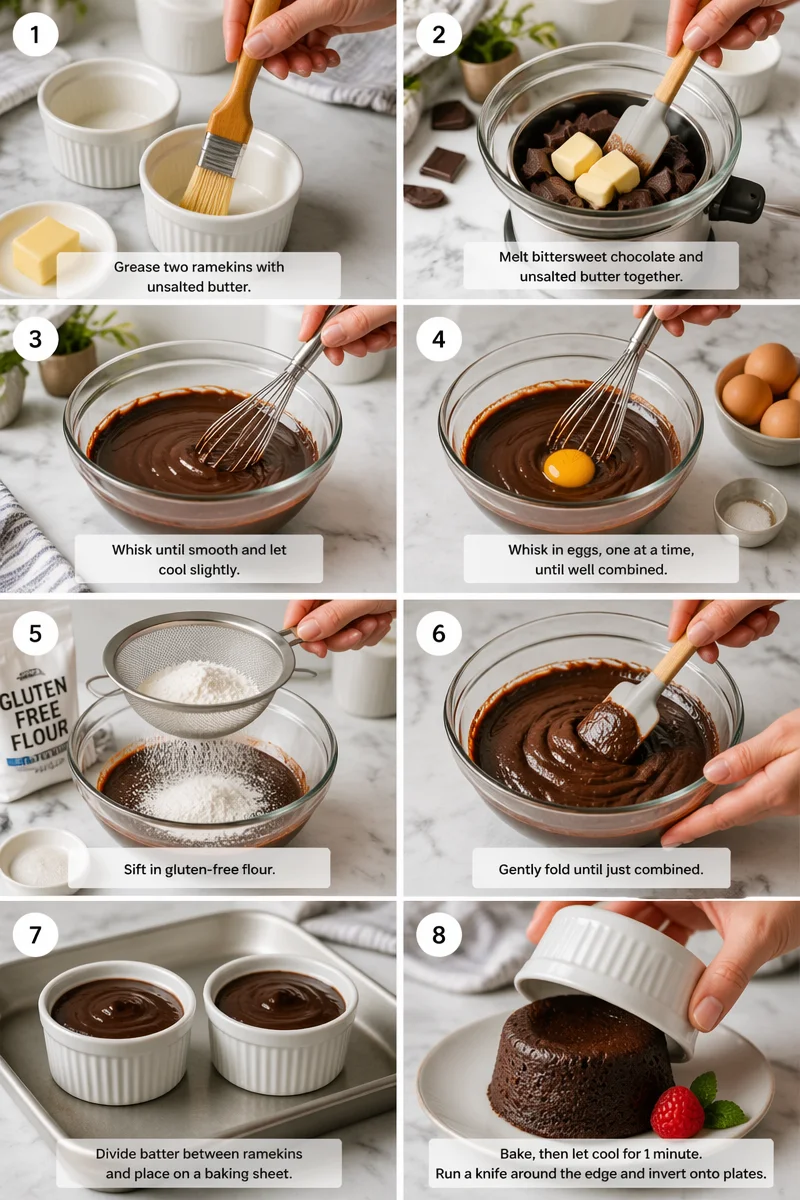
- Step 1: Prep your ramekins. Butter them well, then dust with cocoa powder. Tap out the extra. This is what keeps the cakes from sticking.
- Step 2: Melt chocolate and butter. You can do this in the microwave in short bursts, stirring each time, or over a small pot of simmering water. Stop as soon as it is smooth.
- Step 3: Whisk eggs and sugar. You are not trying to whip it into a huge foam. Just whisk until it looks a bit lighter and the sugar is mostly dissolved.
- Step 4: Combine. Pour the warm chocolate into the egg mixture slowly while whisking. Add vanilla and a pinch of salt.
- Step 5: Add the gluten free flour. Fold it in gently. The batter should look glossy and thick, like pudding that means business.
- Step 6: Fill ramekins. About three quarters full. If you want, add a square of chocolate in the center for extra drama.
- Step 7: Bake. 425°F for about 9 to 11 minutes. The edges should look set, but the middle should still look a little soft.
- Step 8: Rest and flip. Let them sit for 1 minute, run a knife around the edge, then invert onto a plate.
I like serving these with a pinch of flaky salt and either berries or vanilla ice cream. If you want to lean into the fruit thing, you might love this warm and cozy option too: irresistible gluten-free fruit cobbler sweetness without guilt.
“I made these for my sister who is gluten free and she said it was the first time she ate dessert at a party without worrying. The middle was so gooey it looked like a restaurant plate.”
Common Mistakes to Avoid When Baking Gluten-Free
I have absolutely messed these up before, so I am sharing the things I wish someone told me sooner. A lot of gluten-free cakes trending on social media look perfect because nobody posts the batch that stuck to the ramekin.
Here are the big mistakes to watch for:
- Overbaking. This is the number one lava cake heartbreak. Start checking at 9 minutes. If you wait until the center looks fully set, you will get a normal cake, not lava.
- Using super hot chocolate mixture. If it is scorching, it can scramble the eggs a bit. Let it cool for a minute, then combine slowly.
- Skipping the ramekin prep. Butter and cocoa matter. If you skip it, you will be eating “lava cake” with a spoon straight out of the dish, which is still tasty but not the vibe.
- Measuring flour casually. Gluten free flours can be thirsty. For lava cakes you do not need much, so level your spoon and keep it modest.
- Expecting the exact same texture as wheat cake. Gluten free can be slightly more tender or fudgy, and that is a good thing here.
If you are baking for someone with celiac disease, keep cross contact in mind. Clean bowls, clean beaters, clean counters, and check labels on cocoa and chocolate. Being careful is part of being kind.
Creative Variations and Add-Ins for Chocolate Lava Cakes
Once you nail the basic method, you can play around and keep it exciting. This is where gluten-free cakes trending get really fun, because you can make a signature version and people will ask for it again.
Easy flavor twists
- Peanut butter center: Add a teaspoon of peanut butter in the middle before baking. It turns into a gooey surprise.
- Espresso boost: Stir in 1 teaspoon instant espresso powder to make the chocolate taste deeper.
- Orange zest: Fresh zest in the batter makes it taste bright and fancy.
- Raspberry: Drop 2 to 3 raspberries into the center for a tart pop.
- Spiced chocolate: A pinch of cinnamon or chili powder if you like that warm kick.
And if you are feeling extra and want a cute dessert board situation, pair these with mini lemon cakes or other small bites. I love having variety on the table because not everyone is a hardcore chocolate person.
Common Questions
Can I make lava cake batter ahead of time?
Yes. Mix the batter, fill the ramekins, cover, and refrigerate for up to 24 hours. Bake straight from the fridge and add about 1 extra minute.
What gluten free flour works best here?
A 1 to 1 gluten free baking flour blend is the easiest. Almond flour also works, but the cakes can be a little softer, so handle carefully when flipping.
How do I know when they are done?
The edges look set and slightly puffed, but the center still looks a bit soft. If you gently tap the ramekin, the middle should jiggle a little.
Can I bake these without ramekins?
You can use a muffin tin. Grease and cocoa dust it well. Baking time may be a touch shorter, so start checking at 8 minutes.
Why did my lava cake not “lava”?
Usually it was baked too long or the oven runs hot. Next time, shave off 1 to 2 minutes and make sure you are not using a dark pan that overbrowns fast.
A sweet little push to try it this week
If you have been curious about gluten-free cakes trending, these chocolate lava cakes are such a satisfying place to start because they are simple and they feel special. Keep your ingredients decent, do not overbake, and you will get that warm molten center that makes everyone quiet at the table for a second. For more inspiration and proof that wheat free baking is not just a phase, I like browsing Gluten-Free Cakes, Cookies, Pies, and Muffins – Food52, and if you want a deeper nerdy read on how textures work, this research roundup is interesting: Advanced properties of gluten-free cookies, cakes, and crackers. And if you want to compare methods with another baker, check out Gluten-Free Chocolate Lava Cakes + Video – Truffles and Trends. Now go preheat that oven and treat yourself, because you totally can make bakery level lava cakes at home. 

Gluten-Free Chocolate Lava Cakes
Ingredients
For the Lava Cakes
- 4 oz Bittersweet chocolate (60-70% cacao) Provides deep flavor without being overly sweet.
- 1/2 cup Unsalted butter Helps the cakes set around the edges while staying gooey inside.
- 2 large Eggs Plus one extra yolk for a richer center.
- 1/2 cup Granulated sugar Regular sugar works perfectly.
- 1/4 cup Gluten-free flour A simple 1-to-1 blend or almond flour can be used for tenderness.
- 2 tbsp Cocoa powder For dusting the ramekins to prevent sticking.
- 1 pinch Salt Enhances flavor.
- 1 tsp Vanilla extract Adds depth to the flavor.
Instructions
Preparation
- Preheat the oven to 425°F (220°C).
- Butter the ramekins well, then dust with cocoa powder, tapping out the excess.
Baking
- Melt the chocolate and butter together until smooth, either in the microwave or over simmering water.
- Whisk the eggs and sugar together until lighter and mostly dissolved.
- Combine the warm chocolate mixture with the egg mixture slowly while whisking. Add vanilla and salt.
- Fold in the gluten-free flour gently until the batter is glossy and thick.
- Fill the prepared ramekins about three-quarters full. Optionally, place a square of chocolate in the center of each.
- Bake for 9 to 11 minutes until the edges look set but the center is soft.
- Allow to rest for 1 minute, run a knife around the edge, and invert onto a plate.